Well, scooped up another project. This is an oak dresser I got at a thrift store for $10. I originally thought I would turn it into a tv stand and cut the top drawers out but I think I may leave the drawers but still use it for my tv. I also plan to cut that trim around the bottom off and add some legs. This is a future project and I probably won't start it anytime real soon. The dresser has some sort of veneer sheets on top of the entire piece that I'll be taking off. But here's a picture of it.
Well, hello pretty wood! Time to find a scraper and get the rest of this stuff off! The side panels were only veneer so I need to find something to cover them with. I originally thought about bead board but I think I'll stick with a thin sheet of oak. I was also going to originally paint this, but I think I changed my mind and I'm going back to stain.
DAY 3
Last night I picked up some new drawer pulls and knobs for the entertainment stand. I also got 2 2'x4' 1/4" Oak plywood for the sides due to discovering after the veneer was pulled off there was nothing underneath. I also got legs for it that Benton so kindly picked out, they are 7" tall....not sure how those are going to look or how I plan to attach them. They have a big screw on the end of them but I don't have a drill bit that does that...so I will have to think of that one for a bit. But here are some pictures of what I got.
I accidentally only got 2 knobs instead of 4, so I don't know if I'm going to fill the holes and drill new ones or bite the bullet and go buy 2 more...
And not sure about the height on the legs...may have to figure out something there too. I don't want it too tall.
The heat gun helped a little bit with getting the veneer off but it's a really, really, REALLY slow process so far.
DAY 4, 5, OR 6
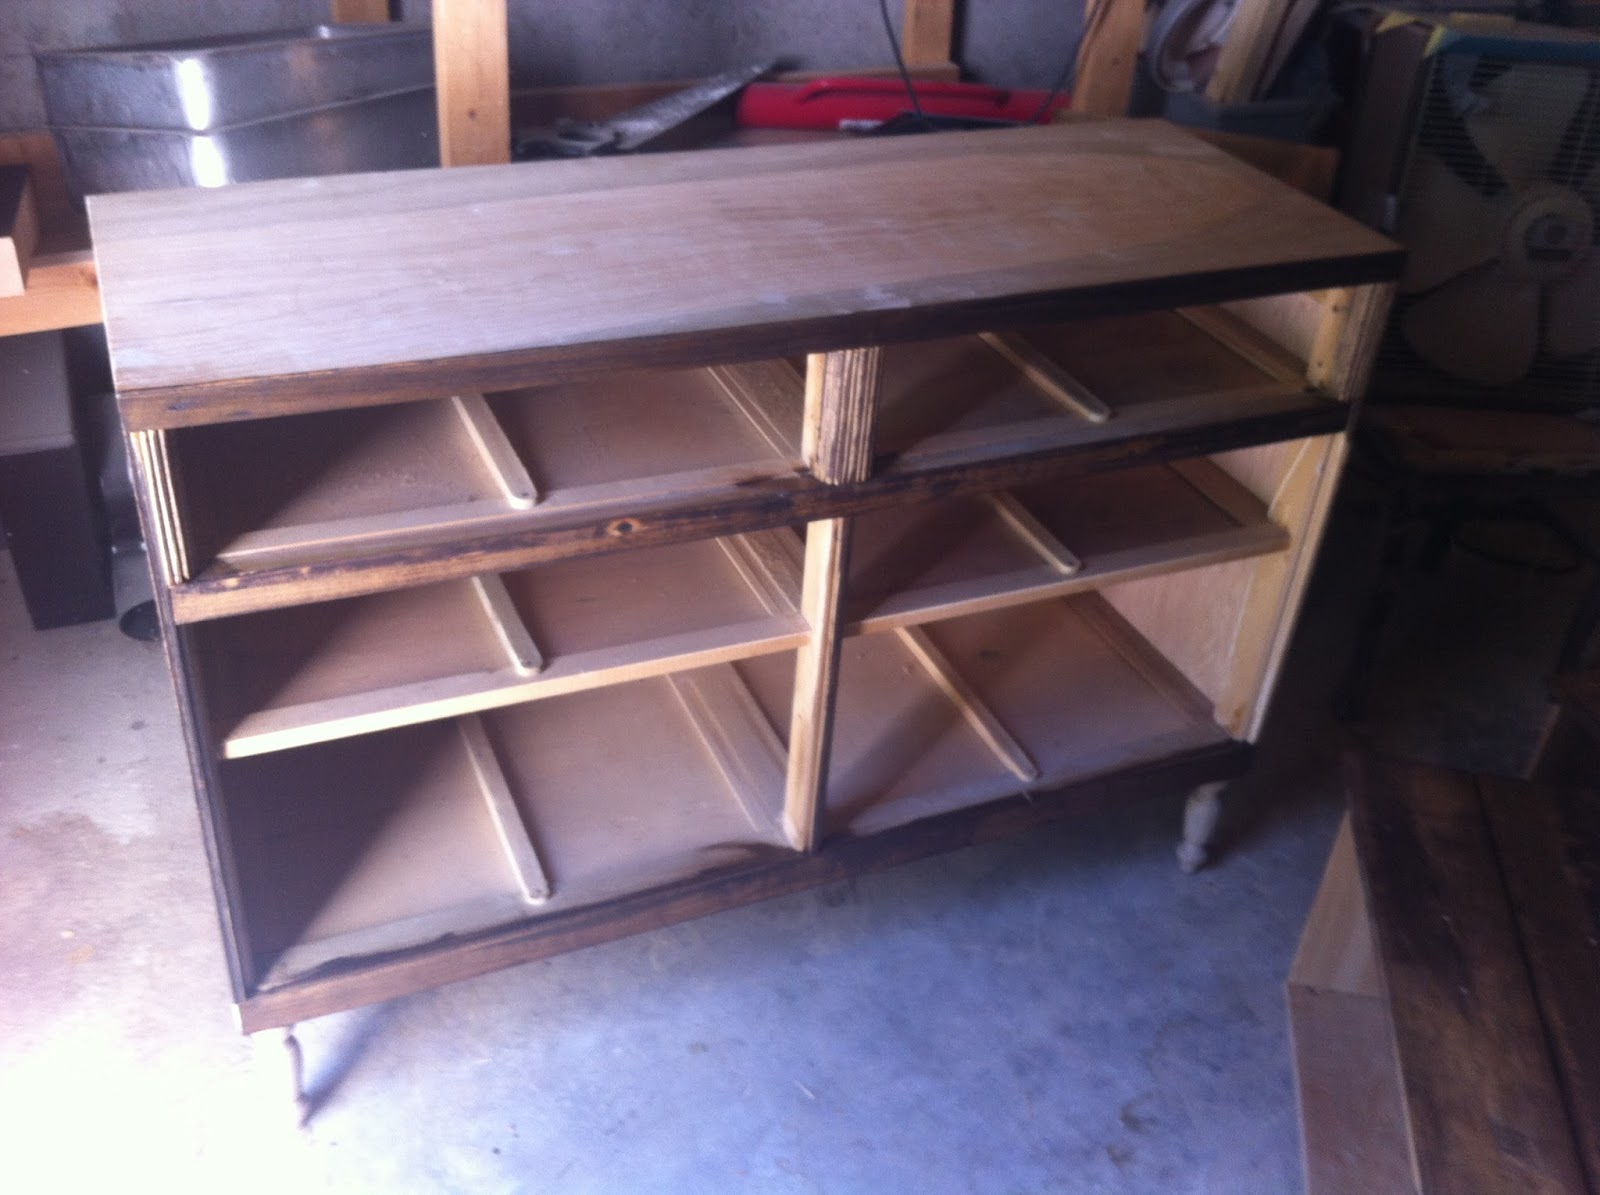
There is absolutely nothing easy about taking this veneer off! On a positive note though, the wood underneath is pretty cool. The wood on the drawers is super dry and I have a feeling that it's going to absorb a ton of stain. But I'm making progress and that's cool, it's just taking a lot longer than I expected. I gave up on the heat gun, it worked a little bit but ultimately I think it's faster to just take my metal scraper and a hammer and chip it off. I have the top done, the sides off, some of the trim pieces that had veneer on it are gone, and 1 drawer (5 more drawers to go). I still need to cut off the bottom (looks like there was once a base to the dresser but the front and back pieces are missing so all that's left are the sides and it makes the whole thing very unsturdy).
DAY 7 or 8
Well, I cut the bottom trim pieces on the sides...attached two of the legs, but ran into a problem with the fact that the trim doesn't cover all the parts I needed to attach the back to legs so I'm looking around for scrap wood pieces to fix that. I have all but one drawer done, so I still need to chip off the veneer on that and sand it. Then I need to fill in the old drill holes with wood filler because my new handles are just a tad bit too short for the distance between the screws to use the old holes. Then I'll need to sand them one more time and add the side plywood boards I got. And then lastly stain, polyurethane and put on the new handles and I'll be all finished with the entertainment stand! Yeah that's a lot to do, it will probably take me another week at the very least.
And as you can see I'm making an absolute mess!
---------------------------------------------------------------------------------------------------
The veneer is finally off! I came out with a leaf sized trash bag full of wood chips! I got the wood filler in the holes on the larger/level drawers (I now need to wait 6 hours for that to dry). Now to figure out the two back legs.
You could also kind of see the leg holder things (not sure what else to call the things the legs screw into) so I decided to take them back off and paint them black so hopefully they aren't as noticeable.
DAY 9
I sanded the drawers that had wood filler on them from yesterday and started staining the drawers while I still contemplate how to fix the bottom for the legs.
Note to self, I don't particularly care for the way that the "stainable" wood filler stains...you can tell I used it...it makes me worried for staining the top. But, mmmmm.....dark walnut!
DAY 10
I got a lot done last night. I got the side plywood attached so you can no longer see through the dresser. I also got the bottom screw things for the legs all attached and pretty level I think. The dresser is definitely more secure and sturdy.
The bigger bottom drawers that used to look like 2 drawers because of the veneer that turned in to 1 gigantic door has some wood cut out of the middle of it to hopefully make it appear as 2 again.
DAY 11
As you could probably tell in one of my latest pictures the reason that the legs are slanted in the back is because I accidentally got 2 of the angled things that the legs screw into. So I got 2 more of the flat ones today and spray painted those black. Even after fixing this it's still a little wobbly so I got levelers to put on the bottom of the legs.
Then I started staining, again I chose dark walnut
The more I stained the more it appeared that the dresser looks antiqued...completely unintentional. I'm not sure how old this dresser is...but I guess it seems fitting.
One of the drawers isn't in because it got wet and swelled up. So I have to do a little trimming on that. But otherwise, what I have left to do is put a coat of polyurethane on it, let that dry and then add the handles. I already drilled the holes for those...so now it's just the waiting game (ugh come on 8 hours).
----------------------------------------------------------------------------------------
Since I seem to be on a roll today, and that I was inpatient and stained the drawers a few days ago I went ahead and put a coat of polyurethane on them. I got a satin finish hoping that they wouldn't turn out too shiny...these look shiny though. Right at the moment that's working to my advantage because it's harder to see the stained wood filler that I wasn't a fan of. I guess I'll find out for sure in a few hours.
DAY 12 (the finale)
Around 10 last night I decided to put the handles on and polyurethane the base of the dresser. When I got up this morning I had to trim a little bit of one of the drawers because it swelled. Much to my surprise, I love the way this turned out!
As always, the before and after picture.