DAY 1
Okay so, finally got started on the second hall tree. And wouldn't you know it didn't take me very long to STOP...and realize that OOPS I do NOT have enough wood for this project. I completely forgot about the front portion to the toy box bench. So, looks like I'll be taking a trip to Lowe's in the morning. Here's where I'm at so far.
Here's the start to the base (told you I didn't get too far).
Yes I'm letting you have a little peek at the supports (to the right of the door) those will be stained dark walnut just like the lid to the storage bench.
DAY 2
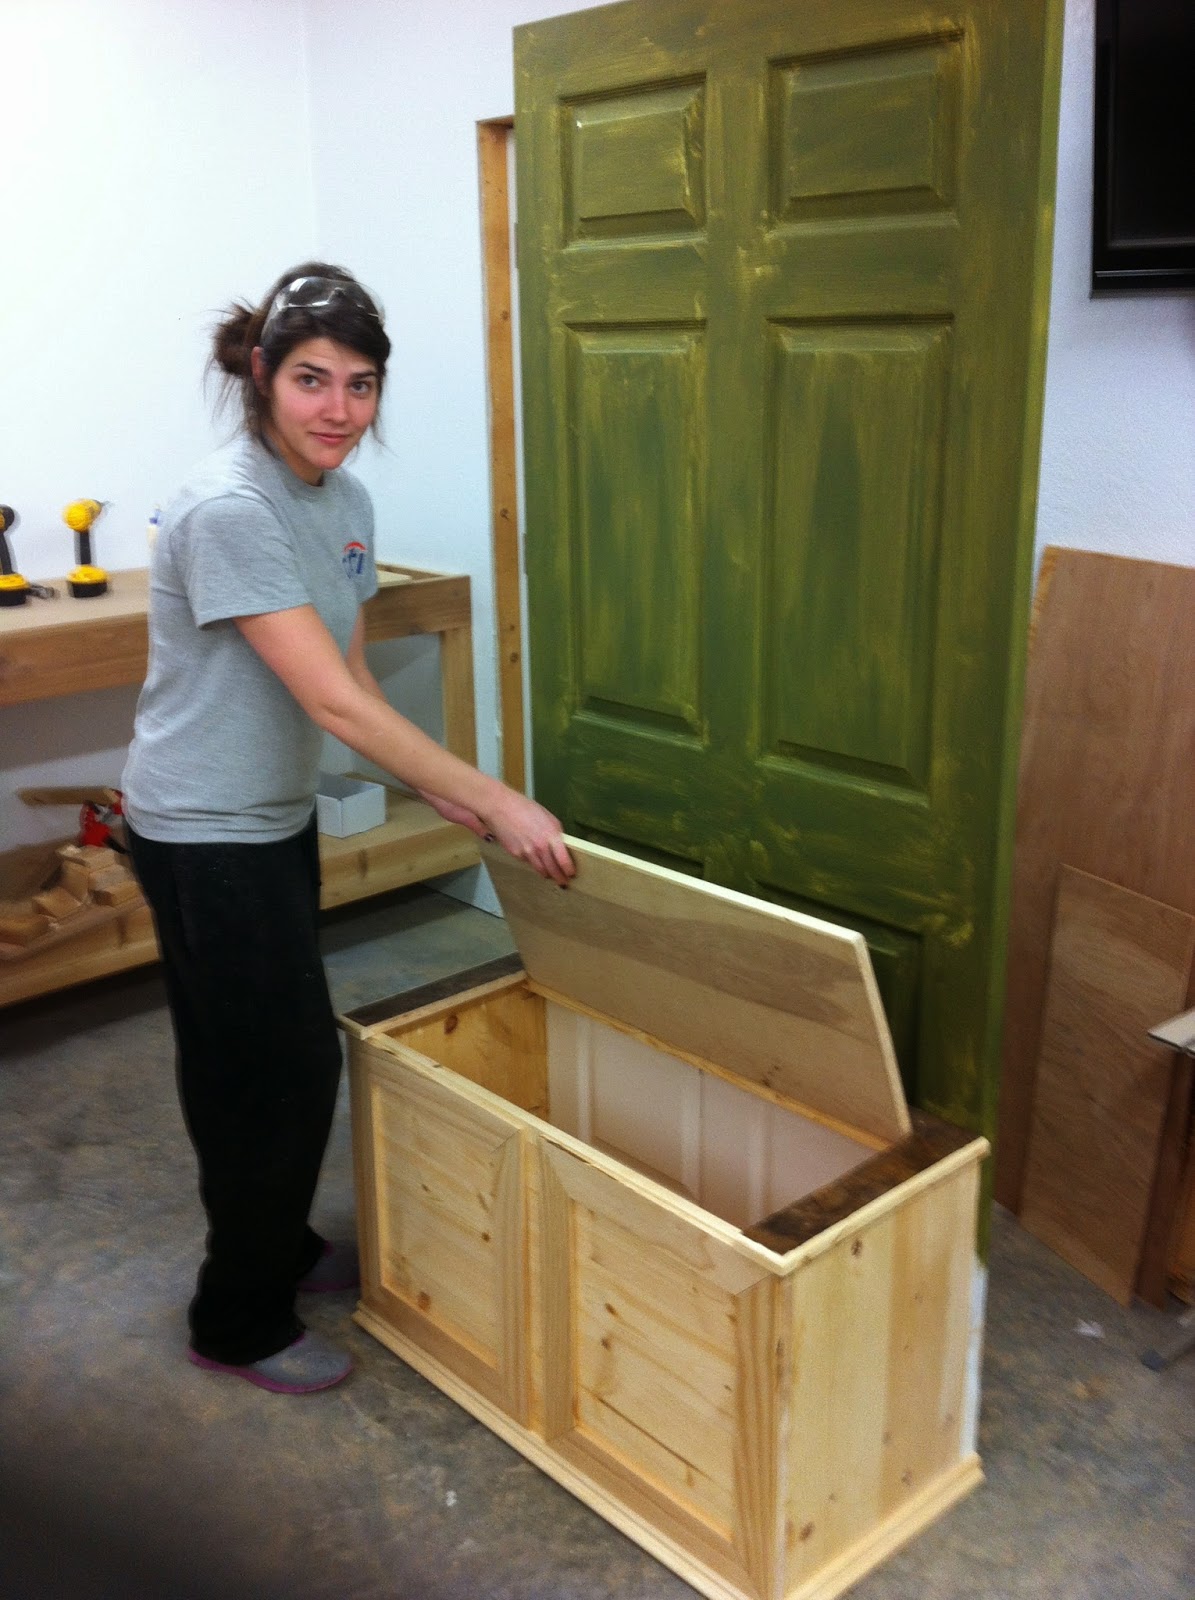
Well, didn't get as much done tonight as I wanted but I did get most of the bottom base built. Is it just me or does the bottom look huge compared to the last one?
So plans for the top, there's going to be a small support that goes under the top lid. Also, going to put trim around the top and go over it with the router to give it a nice finish. Still trying to decide if I'm going to stain the entire top or just the lid that lifts up. Regardless, I picked up some more stain tonight and the hinges.
Used some wood glue and the Kreg jig to make sure everything stays perfectly in place. Letting it dry over night. Tomorrow I'm hoping to add the molding to the bottom, reapply the last layer of wood filler where the hinges and door knob used to go, add the trim to the top lid, cut out the top lid, and go over the trim with the router. I know, I know...that's a lot to get done in one night, but that's the plan. That way all I have left to do is paint, stain, and wax which is probably going to be a 3 day ordeal. And then lastly add all of the fixtures. Phew, that's making me exhausted just talking about it. To be continued...
DAY 3
Well, I got most of everything done that I was wanting to. Jared came by to help out which was really nice. Here's where we are at.
First I added the molding to the bottom, then the trim to the top lid after cutting it down a bit...didn't go over it with the router because I used a thinner piece of wood for the trim and dad thought it looked better this way. Jared helped me cut a board to place underneath of the lid just for an additional support (he acts like this isn't his thing but secretly I think he likes it).
Then went back in with wood filler and patched up the rest of the holes where the old hinges/door knob used to go. Once that hardened I sanded it.
Here's just another view of the trim and molding. Now all that's left to do is cut out the lid and add the hinges (dad I'm definitely in need of your help figuring those out). Oh wait just kidding...that won't be the last thing...I was talking with dad and I believe we're going to make 2 frames to put on the front of the storage box just for some added dimension (trying to use proper terms here....does that sound right?). Then we can paint, stain and sand. WOOHOO!
DAY 4
I ended up getting some smaller pieces of pine ($3.09 each and I ended up getting four since they were only 2 ft long) and cut them down to a 2.5" width and did a 45 degree angle on the ends to make a picture frame type deal for the "added dimension", I made 2 of these one for each side and a little space left in the middle.
I began to stain the top lid. I decided to not cut the lid out and make a back attachment. Once the stain dries on the side supports and the lid I'll put a coat of polyurethane on them. I'll also stain the inside of the storage box but I won't put any polyurethane on it.
And Maria helped me put the first coat of olive green chalk paint on the door. I know you can't really see what the end result will be right now but I promise it will look great!
DAY 5
Made some gains on the ol' hall tree tonight. First, cut out the lid (actually dad did because I can't cut in a straight line to save my life).
Next order of business, routing the edge of the top lid. This was my first time trying and I have to say I'm a big fan of the router!! Made the top look much more finished I think.
A little preview of what the side supports will look like.
And put a 2nd coat of the olive green chalk paint on the door. I did the front and Maria was kind enough to help me with the back.
So...what's left to do (since I've already surpassed my deadline I made for myself...might as well take my time at this point):
- Polyurethane the side supports and the top lid
- Stain the inside of the bench (not going to poly the inside but what should I do with the white part of the door??? Try to paint that too or leave it white? Decisions, decisions.)
- Sand the bottom bench and paint with two coats of olive green
- Put a clear coat of wax followed by a layer of the dark wax (trying to also decide if I'm going to put the dark wax all over the piece or just where the boxes are and molding)
- Put all of the fixtures on (door knob plate, coat hooks, top decorative piece) there won't be a shelf on this one
DAY 6
I was on a roll with the hall tree last night!
I got the top lid all stained and polyurethaned (side supports are done too), I stained the inside of the storage bench (Dark Walnut from Minwax). I also painted a third layer of the olive green on the door...it just didn't seem to cover all that well. If the door were a dark wood underneath if you have looked cool to distress but it's a white door so that wasn't an option here.
I still need to paint the bottom of the door but I also got the bottom bench painted with two coats of the olive green on the outside...now, here's where the change of plan comes in. I stained the rim of the top of the base with dark walnut...it seems only fitting to stain the bottom molding to match. Trouble is I already painted it so this is going to set me back another day to sand it with all the details and grooves that the molding has....darn.
And here's where I finished yesterday evening.
So tonight I have to:
- Sand the bottom molding
- Stain and poly the bottom molding
- Paint the bottom of the door
It's doubtful I will get more done than that...but if I do end up having spare time a coat of the clear wax will be next.
Then plans for Friday include:
- Clear wax if I don't get to it tonight
- Dark wax in just the detail areas
- Attach all of the fixtures (I also need to pick up a can of flat black spray paint [Valspar brand for metal $4.98/can] for one of them because it's brown and the rest of the fixtures are black)
And lastly, my pride and joy made his own project too! Check out his castle he made.
DAY 7
Just when I think it's all coming along...things happen, we'll get to that story in a minute. I did do the tedious work of painting the door inside the storage area. I just taped it off and put on a couple of coats.
And then here it is with the tape removed.
Well, I forgot my Dremel to sand the bottom molding (it happened to have been left in the cutest pink tool bag that a girl could ask for). So I decided to put on all of the fixtures on tonight after I put a coat of clear wax over the piece. I also used the Valspar flat black spray paint for metal on the door knob plate, I just put a thin layer on there and it dried pretty fast. Then, I ran into my next dilemma. Let's see if you notice what the problem is here...
WHAT IS THAT?!?!? You think I would have noticed when I was buying them that this hook is completely backwards. And no, you cannot just turn it around because it's welded on that way. So I'll be making a stop at Hobby Lobby tomorrow to exchange (and they better not give me grief). But aside from that all of the fixtures are hung (which includes: side supports, door knob plate, hinges, top decorative piece and 2 of the 3 hooks).
Then just over the details I used the dark wax and rubbed it in with steel wool which I think added a nice subtle touch. The up close picture didn't turn out all that well.
And here's where we ended tonight. So I pretty much did everything on tomorrow agenda tonight...go figure.
So tomorrow, there should be a 3rd hook hung in the middle and the bottom molding will be sanded, stained, then a coat of polyurethane.
DAY 8
Hobby Lobby was an easy transaction this morning, and as luck would have it I got the last hook in stock! I striped the bottom molding and sanded it and replaced the olive green color with dark walnut stain and a coat of polyurethane. And she's officially complete!
Dimensions: 80"x35 3/4"x17.5"
.JPG)
.JPG)
.JPG)
.JPG)


.JPG)

.JPG)
.JPG)
.JPG)
.JPG)


.JPG)
.JPG)
.JPG)
.JPG)
.JPG)
.JPG)
.JPG)
.JPG)


.JPG)

.JPG)
.JPG)


.JPG)


.PNG)
.JPG)
.JPG)
.JPG)
.JPG)
.JPG)
.JPG)
.JPG)
.JPG)
.JPG)


.JPG)