Same blog, different name. I've recently updated my URL to match my Instagram account, hopefully making things easier to find.
Formerly chandakri.blogspot.com has now been updated to workshopgirl3.blogspot.com

Thursday, August 27, 2015
Monday, August 24, 2015
Living room
Getting somewhere on the living room too. Needing to get some curtains for this room also.

Sunday, August 23, 2015
My Bedroom
Much more to come on this post. Seems like I'm getting more done on the outside of the house than the inside. Hung a couple of the corner shelves that I made and currently in process of finishing the binding on the quilt.
Next plans involve making some coral curtains...


Next plans involve making some coral curtains...


Getting more pictures hung up. Hopefully here pretty soon there will be coral curtains and coral throw pillows. My room colors are definitely out there.
The quilt is still a work in progress as is unpacking as you can tell.
Hopefully I'll get to work on curtains this weekend but the quilt is all finished, my room is beginning to look better.
I got started on my curtains today. Can't wait to get them hung!
I also got white fabric to go on the back so they aren't see through since I don't have blinds.
Making progress
Don't mind my cat
Super hero wall decorations
I really wanted to make Benton's room special, he absolutely loves super heroes so that's what we decided to go with. Must give credit where credit is due, I got this idea from Pinterest at All Things Thrifty. Looked off the picture and here was my experience with making these wall art signs.
I went to Home Depot and got a sheet of 1/4" plywood and cut them down to 12"x12". I spray painted each of them a different color. We are doing Captain America, Batman, Superman, and Spiderman.

I did 2 coats of spray paint just to make sure I covered them all then I put wall hangers on the upper part of the back of each one.
Thanks to google images and powerpoint, I made my own templates to trace on the left over plywood I had lying around.

Cutting these out was a chore, spent some time in the driveway with a jigsaw cutting them out. Then I sanded them, they didn't come out perfect but they'll do just fine.

After sanding them I spray painted the logos.

The battery to the jigsaw died and I still have 2 left to cutout, but it was a good stopping point for me yesterday. I picked up 3 pieces of felt from Joann's fabric and used black for Batman, and blue for the Captain America, these pieces are just to add a different dimension and they go behind the logo. I attached them all with wood glue and sat something heavy on top of them while they dried.

And here are the two I got finished, like I said not perfect but I know B will appreciate them. I'll post more when the other two are done.

*Note to self: really wishing I would have used something thicker than 1/4" plywood because they were a little warped...hope they look okay when I hang them on the wall...
DAY 1
I went to Home Depot and got a sheet of 1/4" plywood and cut them down to 12"x12". I spray painted each of them a different color. We are doing Captain America, Batman, Superman, and Spiderman.

I did 2 coats of spray paint just to make sure I covered them all then I put wall hangers on the upper part of the back of each one.
Thanks to google images and powerpoint, I made my own templates to trace on the left over plywood I had lying around.

Cutting these out was a chore, spent some time in the driveway with a jigsaw cutting them out. Then I sanded them, they didn't come out perfect but they'll do just fine.

After sanding them I spray painted the logos.

The battery to the jigsaw died and I still have 2 left to cutout, but it was a good stopping point for me yesterday. I picked up 3 pieces of felt from Joann's fabric and used black for Batman, and blue for the Captain America, these pieces are just to add a different dimension and they go behind the logo. I attached them all with wood glue and sat something heavy on top of them while they dried.

And here are the two I got finished, like I said not perfect but I know B will appreciate them. I'll post more when the other two are done.

*Note to self: really wishing I would have used something thicker than 1/4" plywood because they were a little warped...hope they look okay when I hang them on the wall...
DAY 2


Update almost a year later:
I decided to change the wall art a little bit. The wood I used was just a little too flimsy for my liking. I decided to go with a sort of shadow box approach this next go 'round, but overall same concept.
I built a frame and painted it gray, the inside I still wanted it to have the look of a tile with the same bright colors.

Thank goodness for painters tape

I added brackets on the back to hang it up. Then I just re-glued all the old cutouts I made.


Simple change but much happier with the way it looks

Okay time for the last two signs...superman and spiderman, leave it to me to save the most difficult for last.

About halfway through, the spider became pretty delicate by the end.

Followed by sanding.

And all hung up.

Not perfect by any means but B loved them! Hopefully the comics I ordered will be here soon so I can start the next part to his room.

Update almost a year later:
I decided to change the wall art a little bit. The wood I used was just a little too flimsy for my liking. I decided to go with a sort of shadow box approach this next go 'round, but overall same concept.
I built a frame and painted it gray, the inside I still wanted it to have the look of a tile with the same bright colors.

Thank goodness for painters tape

I added brackets on the back to hang it up. Then I just re-glued all the old cutouts I made.


Simple change but much happier with the way it looks

Monday, August 10, 2015
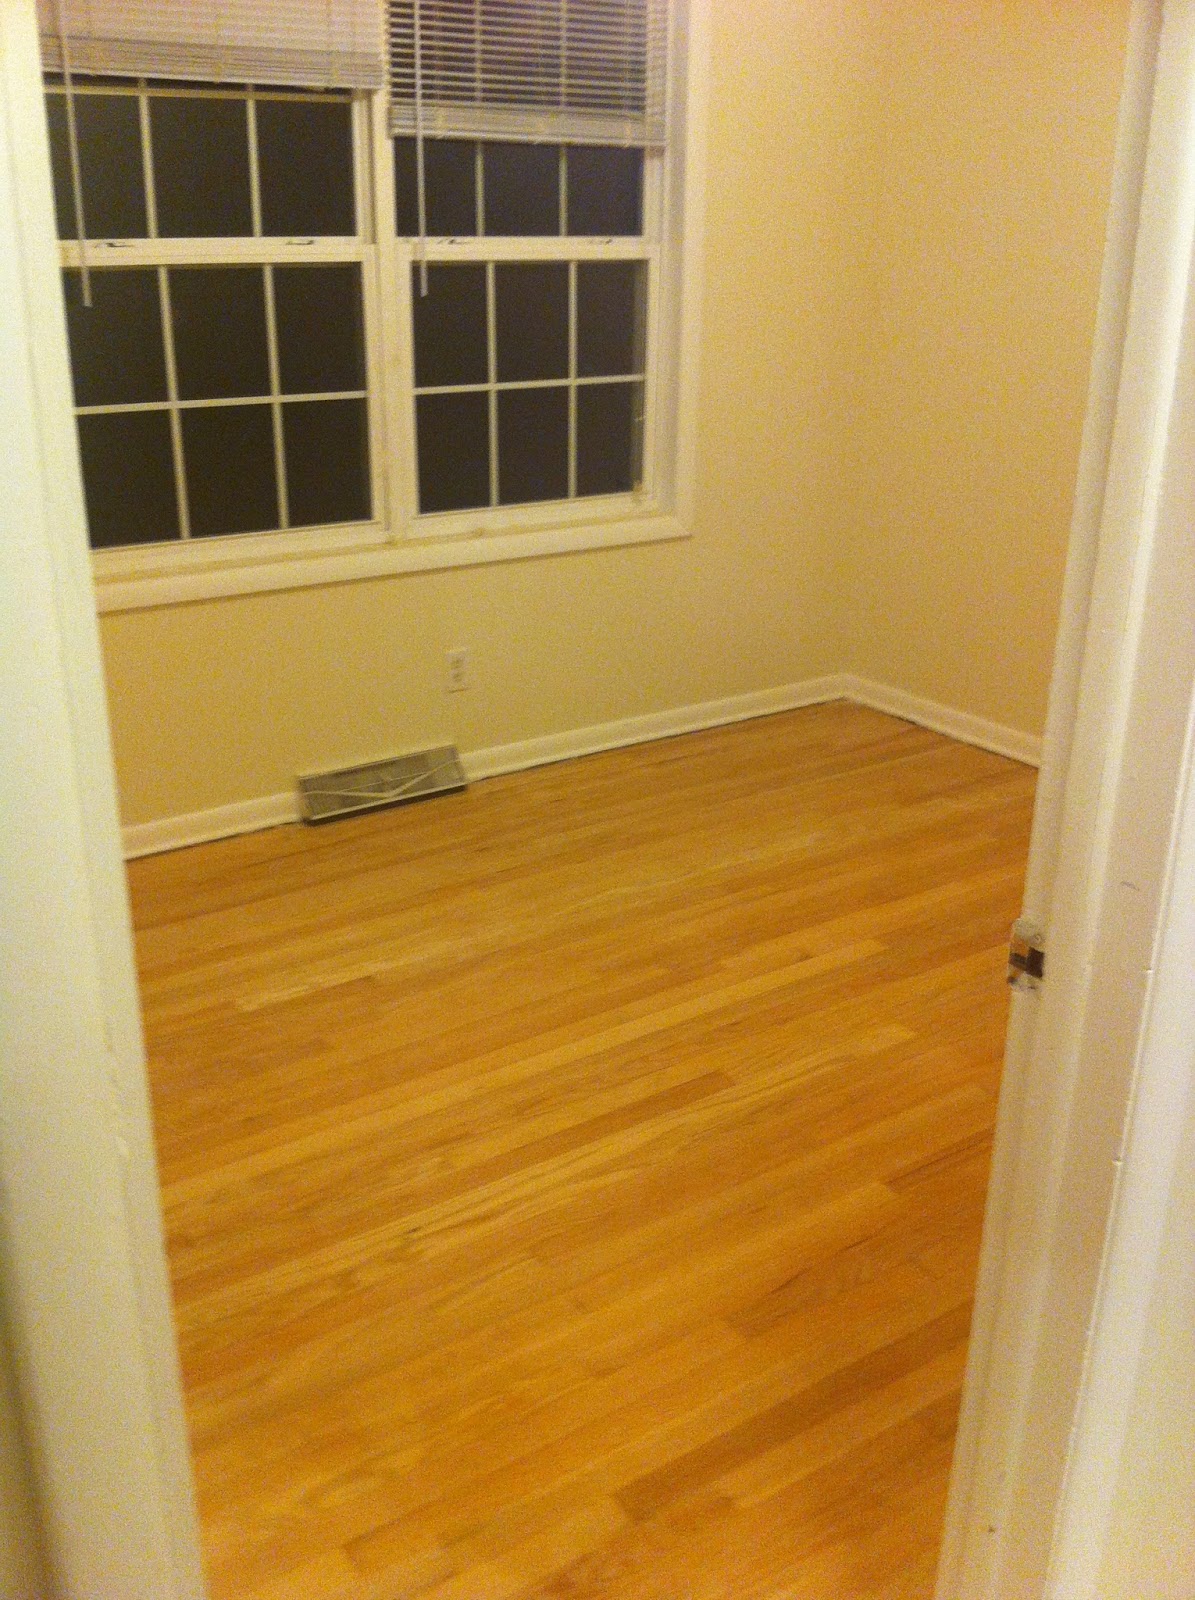
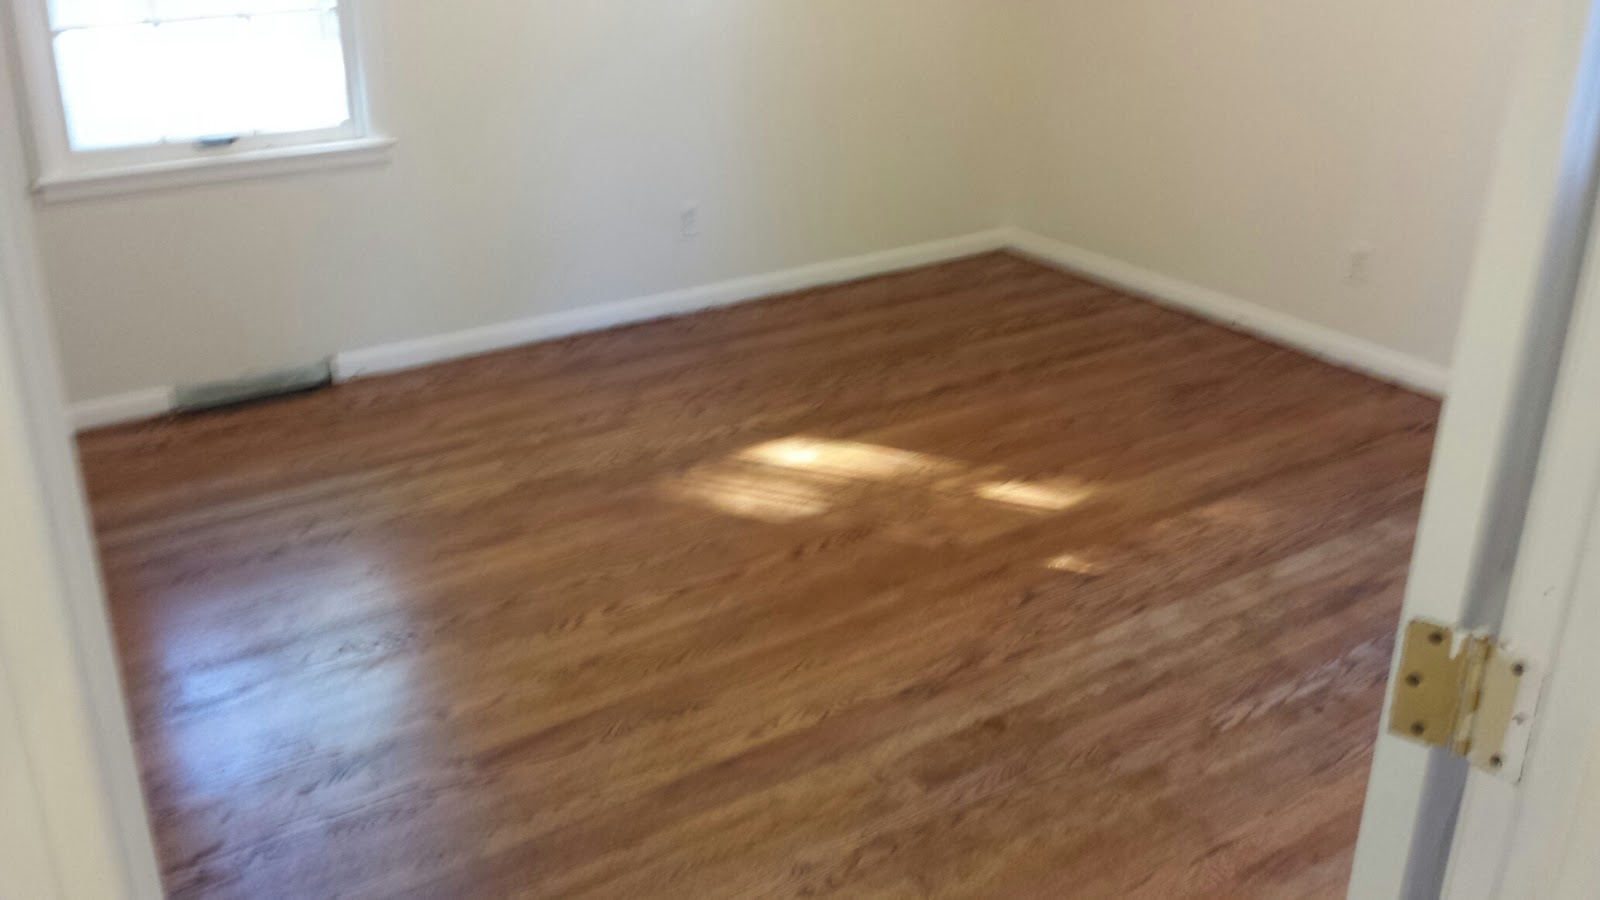
Spare Bedroom/Office - Refinishing hardwood floors
I did get the spare room sanded also. Yes, the dirty Easter egg desk will be going in there.

After staining

After staining

Sunday, August 9, 2015
Little man's room - Refinishing hardwood floors
Also sanded B's floor. It was in pretty rough shape. Although he thought it was "boring" sanding all day...I think he'll be pretty pleased when he sees all his stuff in there. One of my first home projects will be his bedroom, he wants a super hero theme.
You can see all the black marks before and after sanding

But overall the appearance is much better

After staining

You can see all the black marks before and after sanding
But overall the appearance is much better

After staining
Master Bedroom - Refinishing hardwood floors
Here's where I began trying sanding for the first time, 3 different grits of sand paper for each tool (drum sander and edger....didn't care for edging, it's a back and leg breaker). Also, replaced a couple boards in my room because they dipped really bad and also the previous owners tried to fill them with something...looked like wood glue to me.

One last before I stain picture

After staining and 3 coats of polyurethane


The first swipe using the drum sander.

Boards I replaced
One last before I stain picture

After staining and 3 coats of polyurethane


Friday, August 7, 2015
Kitchen and Dining Area - Refinishing hardwood floors
The dining area I didn't have to do much to. It was painted a gray color so I just repainted that with the same colors as the living room (I used the same colors throughout the house) and also painted the trim.
The kitchen on the other hand still needs some work. From what was once the most updated appearing room in the house, it's now trailing behind the others. It had tile layed down on it, some was grouted, others were broken because they weren't grouted. Regardless, all of that got ripped out and was replaced with oak flooring that was used and tore out of an older home.
I got all this used oak flooring from a friend and teacher from my home town. Man, it's good to have friends. What a difference this made.

I should have gotten some up close pictures of the tile, so you'll have to imagine what was described above. Trust me when I say, it needed to come out!


You can see where the hardwood ended and where the tile once was began. I had to cut out some of the hardwood to make it appear like it had always been there and get rid of the threshold line.
And we rented this handy nail gun for wood flooring...really big huh? Actually it was pretty fun and easy to use.

And the beginnings of installing the used hardwood. First place that got done was underneath where the dishwasher sets.

Finally all the kitchen flooring has been layed down

This last picture was taken before I finished the last of the kitchen flooring. Took a while to get them fit in there all snug. Will update more once they've been sanded and refinished!

And one final picture before it gets sanded.


Wanted to share an update on the kitchen now that it's been stained and has a coat of polyurethane on it (still needs another coat). Happy to report that the home made wood filler stained pretty good. I know it's not perfect, but I am super happy with how it turned out.

The dining room after being stained

The kitchen on the other hand still needs some work. From what was once the most updated appearing room in the house, it's now trailing behind the others. It had tile layed down on it, some was grouted, others were broken because they weren't grouted. Regardless, all of that got ripped out and was replaced with oak flooring that was used and tore out of an older home.
I got all this used oak flooring from a friend and teacher from my home town. Man, it's good to have friends. What a difference this made.

I should have gotten some up close pictures of the tile, so you'll have to imagine what was described above. Trust me when I say, it needed to come out!


You can see where the hardwood ended and where the tile once was began. I had to cut out some of the hardwood to make it appear like it had always been there and get rid of the threshold line.
And we rented this handy nail gun for wood flooring...really big huh? Actually it was pretty fun and easy to use.

And the beginnings of installing the used hardwood. First place that got done was underneath where the dishwasher sets.

Finally all the kitchen flooring has been layed down

This last picture was taken before I finished the last of the kitchen flooring. Took a while to get them fit in there all snug. Will update more once they've been sanded and refinished!

And one final picture before it gets sanded.

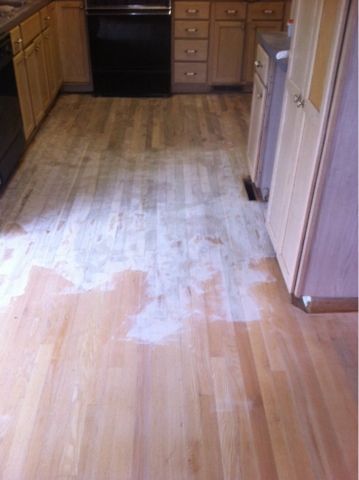
I'll have to admit, I'm a bit nervous to stain the kitchen floor. I made my own wood filler for the first time using sawdust from sanding the floors, spackling and water. The gaps look better but still doesn't calm my nerves...
Here's a picture after using the drum sander with a 24 grit sand paper
And here we are after applying my home made wood filler
A closer shot of my concoction
And more sanding which everyone knows is my favorite thing to do in the world...(insert sarcastic eye roll here)
Wanted to share an update on the kitchen now that it's been stained and has a coat of polyurethane on it (still needs another coat). Happy to report that the home made wood filler stained pretty good. I know it's not perfect, but I am super happy with how it turned out.

The dining room after being stained

Subscribe to:
Posts (Atom)