
The kitchen on the other hand still needs some work. From what was once the most updated appearing room in the house, it's now trailing behind the others. It had tile layed down on it, some was grouted, others were broken because they weren't grouted. Regardless, all of that got ripped out and was replaced with oak flooring that was used and tore out of an older home.
I got all this used oak flooring from a friend and teacher from my home town. Man, it's good to have friends. What a difference this made.

I should have gotten some up close pictures of the tile, so you'll have to imagine what was described above. Trust me when I say, it needed to come out!


You can see where the hardwood ended and where the tile once was began. I had to cut out some of the hardwood to make it appear like it had always been there and get rid of the threshold line.
And we rented this handy nail gun for wood flooring...really big huh? Actually it was pretty fun and easy to use.

And the beginnings of installing the used hardwood. First place that got done was underneath where the dishwasher sets.

Finally all the kitchen flooring has been layed down

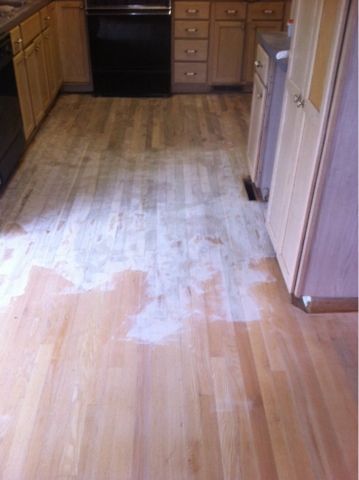
This last picture was taken before I finished the last of the kitchen flooring. Took a while to get them fit in there all snug. Will update more once they've been sanded and refinished!

And one final picture before it gets sanded.

I'll have to admit, I'm a bit nervous to stain the kitchen floor. I made my own wood filler for the first time using sawdust from sanding the floors, spackling and water. The gaps look better but still doesn't calm my nerves...
Here's a picture after using the drum sander with a 24 grit sand paper

And here we are after applying my home made wood filler
A closer shot of my concoction

And more sanding which everyone knows is my favorite thing to do in the world...(insert sarcastic eye roll here)

Wanted to share an update on the kitchen now that it's been stained and has a coat of polyurethane on it (still needs another coat). Happy to report that the home made wood filler stained pretty good. I know it's not perfect, but I am super happy with how it turned out.

The dining room after being stained

No comments:
Post a Comment