
From the realtors pictures, here's what I started with.

The tile on the floor was all broken, and the backsplash had seen better days. One of the first things that I did to the kitchen was remove all the old tile and lay down oak flooring. Now, I won't say that it's anywhere near perfect...but a family friend graciously gave me their old oak flooring when they were remodeling their rental house. Weird deal about that is, I lived in that rental house a short time growing up....small world. Anyway, nothing a little sanding and stain couldn't fix. To view that project click here.

Shortly after installing a new faucet and giving the old sink a good scrub, I got to looking at the laminate counters. I like blue and all but, I really wanted to lighten things up in the kitchen. Plus, there were some holes drilled in the counter and that bothered me every time I saw them. So I decided to try to paint the counters. Now, this was a huge leap of faith but everyone told me...if it doesn't work out that you can then just replace them. Happy to report that the painting turned out alright. Click here to see the complete process.

A little bit of a giveaway from the last picture, but during the time of painting the counters I also tore out the old backsplash. I didn't want to chip or ruin the counter tops by having a bunch of tile falling on it. So yes, the next project in the kitchen was to put on new backsplash. You can see that blog post here. I also added a pull out kitchen trash can in my cabinets.

Another built in "to-do" was to replace the blinds. I ended up building bifold shutters and stained them to match the floor. You can view that tutorial here.

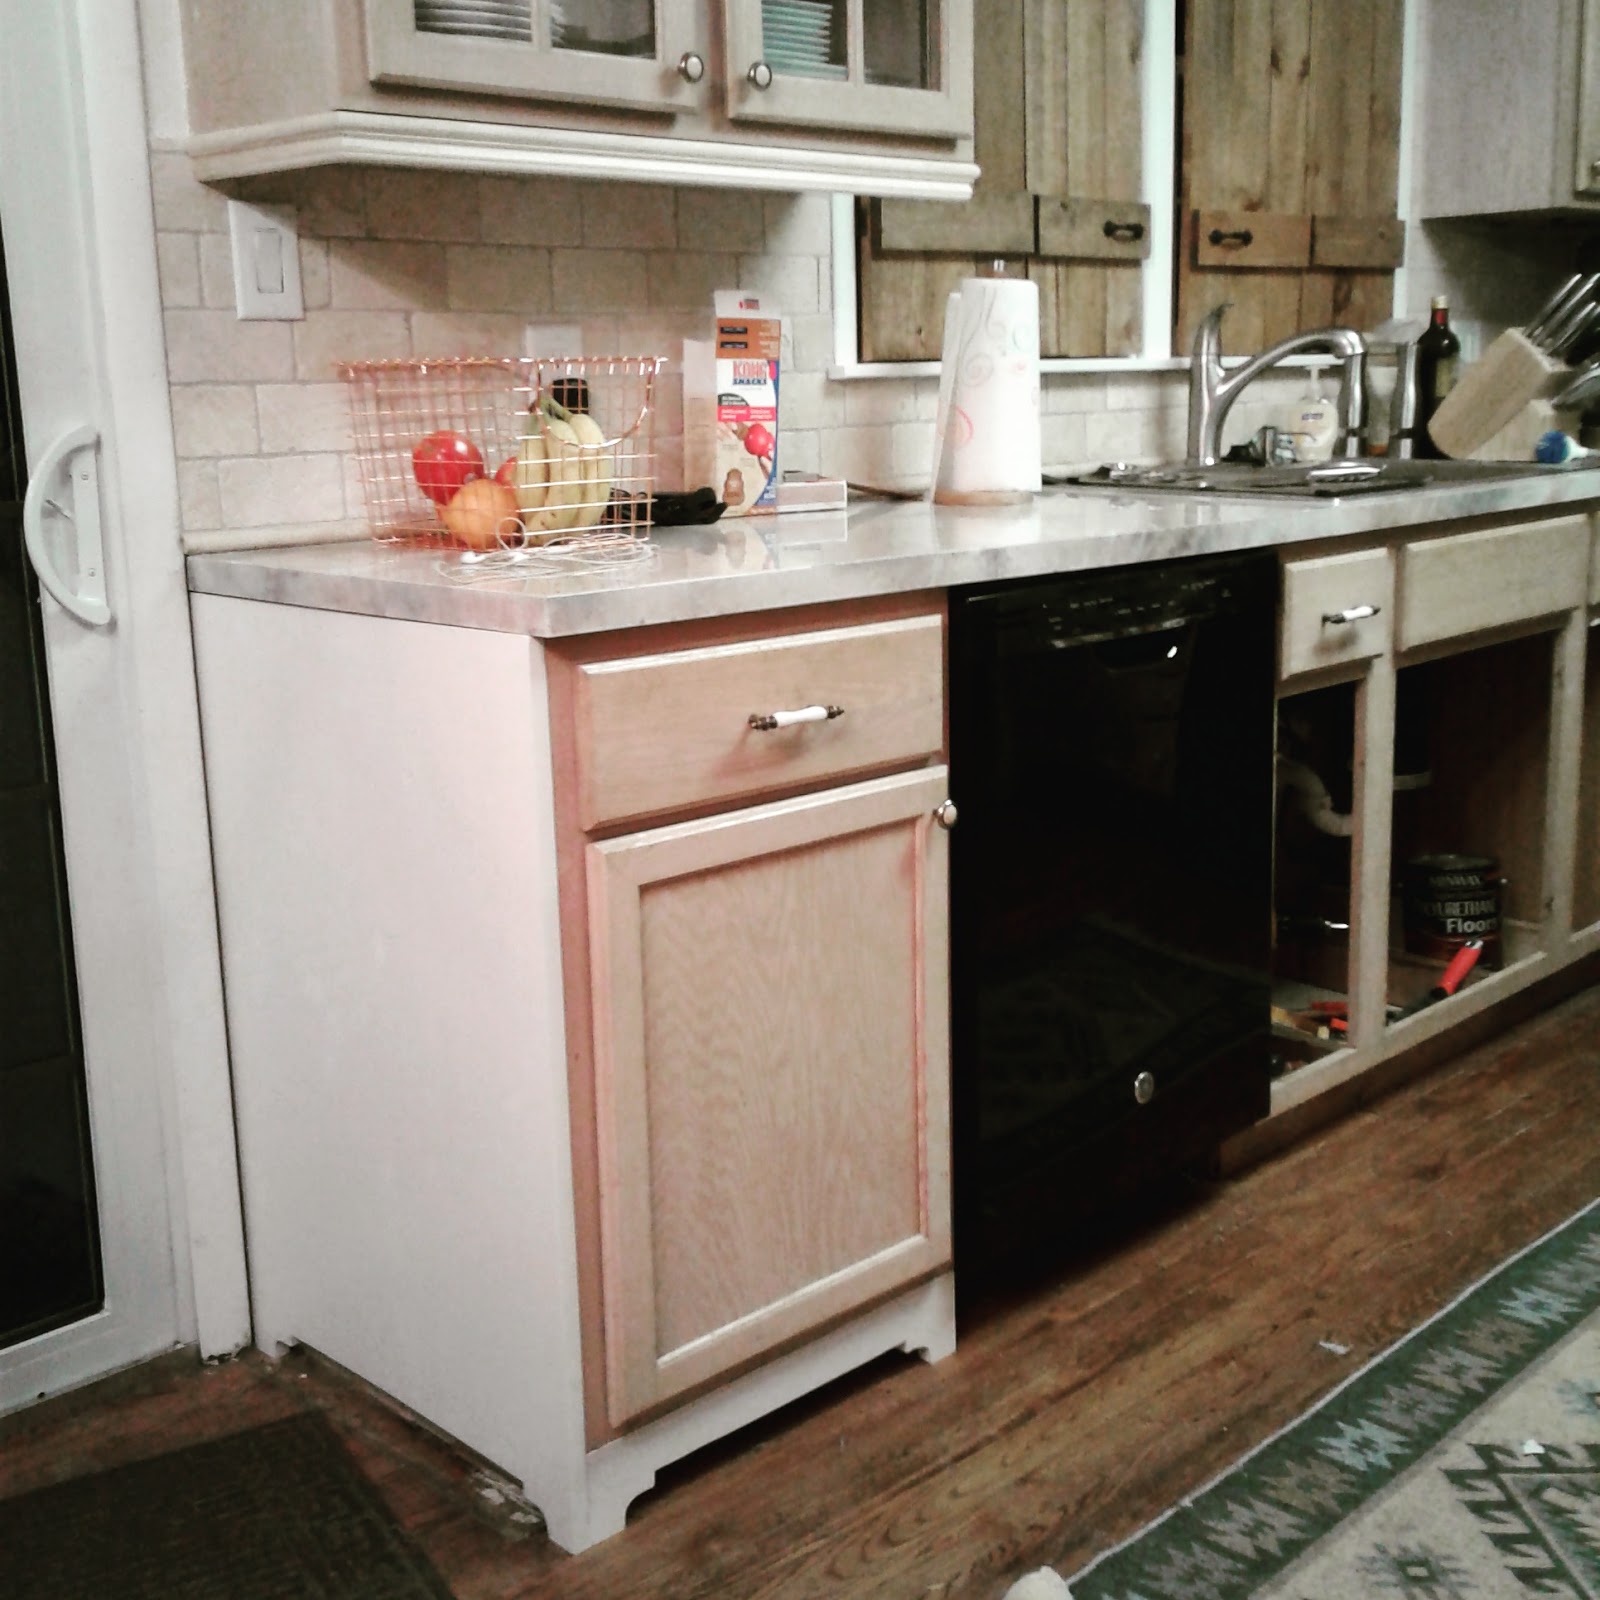
Now the real eye sore in the kitchen is the cabinets, from the bottom trim that's bowed and no longer attached to the mismatched handles.
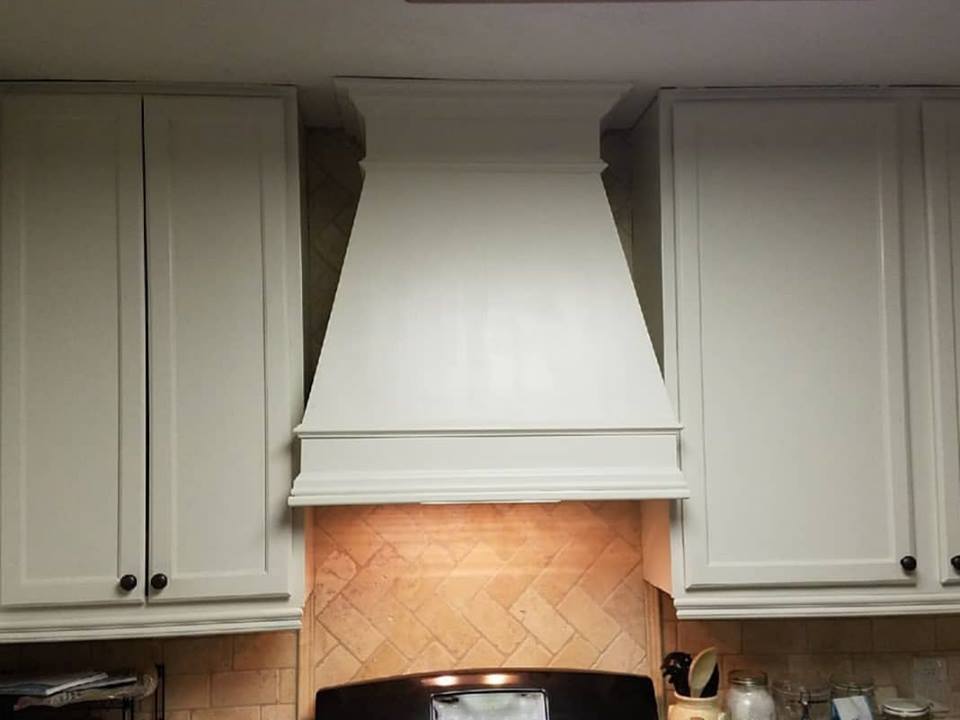
Speaking of cabinets, there was one cabinet I took out completely when I was doing the backsplash. I made a faux hood vent (there's an under the cabinet vent under there).
You may also recall a previous post when I had to replace under the sink due to a leak we had.

Next order of business was adding furniture feet to the bottom of the cabinets. We wanted them to appear like they were separate pieces of furniture and the current trim was hit or miss under the cabinets.


As you can see from the picture above, the cabinet on the right has the new furniture feet added. After sanding and painting them we attached them with nails from the nail gun and caulked them (we will put 1 last coat of paint on them later). You can also see the area under the sink doesn't have the new furniture feet....I think they make a huge difference.
We also added trim underneath the upper cabinets just to make them look a bit more updated.

After using liquid nails and nails from a nail gun to attach the new trim, we also caulked it prior to paining.

We made a valance to cover up some old track lighting that was above the sink (one less light to have to replace). I think this addition really helped the kitchen come together. We just used a stencil to cutout the basic shape and routed the edges.


A little bit of sanding, a couple coats of paint, added some trim and we were done.


We had a couple of vents in the kitchen that have seen better days, instead of buying new ones we spray painted them bronze.
Before

After

You may notice in a few of the pictures above that our cabinet doors are missing, we decided to go ahead and paint them in white. We removed all the hinges and sanded the doors and bases of the cabinets just enough for paint to adhere. We used a paint primer from Valspar and 2 coats of Benjamin Moore paint called Swiss Coffee.

We had knobs and drawer pulls in the kitchen before (which were all mismatched). After picking out the new ones, our kitchen drawers existing holes for the drawer pulls were too close together. So we had to wood fill those and drill new ones. Getting the new holes level and the correct spacing was a headache for us so we ended up purchasing a Kregg jig that did that part for us.


Some progress pictures of painting the doors...

And bringing them back inside.


My dad also helped me out with making a faux over the range hood.

Once we attached the hood vent, we gave it a couple coats of paint just like the surrounding cabinets.
I'll be sure to update with more things to come, but progress is progress. I have plans to replace the light fixtures, but that will have to be another day.


