I forgot to post about this dresser restoration. I really love to share my experiences but never seem to find time to update the blog.
This used to be my oldest son's dresser, you may remember it from this old blog post, oh my how styles have changed! Anyway, the dresser is now being used by my youngest and was in much need of a change.
Here is what we began with (hardware was already removed)...
SANDING, SANDING, SANDING...
I ran into a bit of a problem when sanding. I'm not sure what the top of this dresser was made of, because I thought it was solid wood, I'm not sure if there's composite wood under there but I hit some stuff sanding and it was NOT GOOD! So in the picture below, you will see what I'm talking about. WHAT IS THAT?
I also had to use wood filler on the drawers and give the face of the drawers a light sanding because of the paint decals that were on top of them.
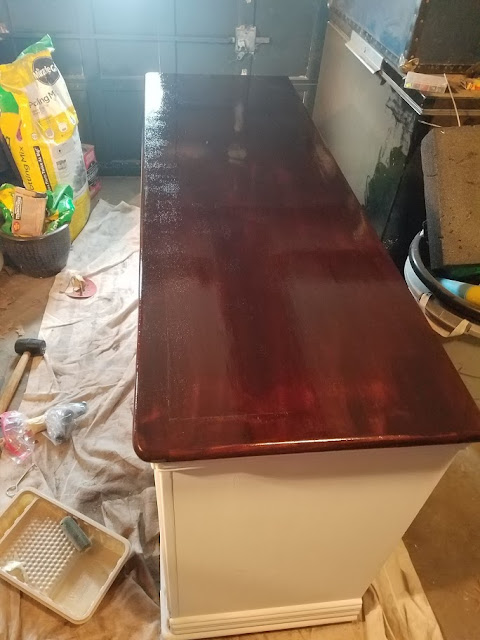
So I tried to stain the top of the dresser, and the spots in the sanding photograph stuck out like a sore thumb. What I ended up doing was using a gel stain, that had seen better days. It was old stain and super thick. I probably should have made a run to the hardware store, but I didn't. So I spread the really gooey gel stain on the top and had to let the dresser dry for over a week!
For the most part, the gel stain covered up the sanding spots. This gel stain is dark walnut from Minwax.
I put on about 5 layers of a UV polyurethane gloss. Make sure to sand in between each layer for a smooth, shiny surface! The bottom of the dresser was done in Annie Sloan Chalk Paint, this color is called Old White. I did 3 coats of this color followed by clear wax.
I got the drawer pulls from Amazon, in 10" and 15" lengths in an oil rubbed bronze finish. I got the center knob at Hobby Lobby.
Be sure to wait at least 3 days before placing anything on top of your finished product.
The before and after...
Click here to check out some of my son's room decorations.
Click here to see another dresser that was restored.


No comments:
Post a Comment