After my son moved down to the basement, he was given a hand me down dresser that was in much need of LOVE! This was a very sturdy piece of furniture, unfortunately most of the drawer pulls didn't function correctly.
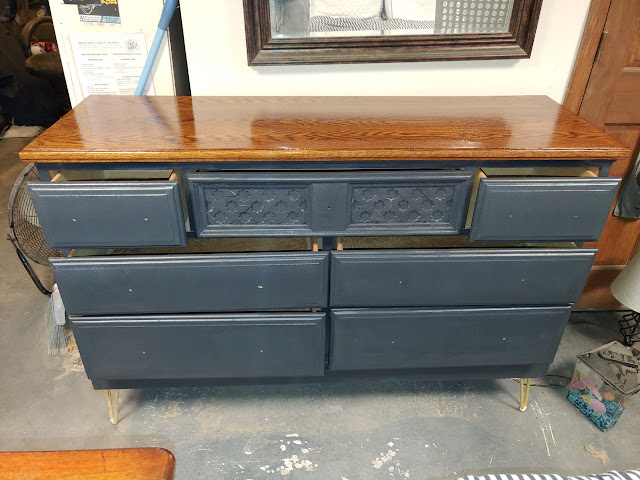
Here is what we started with...
I ordered some awesome furniture feet from Amazon. I removed all the old drawers and installed the feet. I had to cut down some of the existing wood underneath to make them attach correctly.
If you've ever read any of my blogs in the past, you know my least favorite part of any project is sanding. Thankfully though, I only needed to sand the top. I've gotten really into the stained top and painted bottom look, I did the same thing on my other son's dresser.
All the scratch and scuff marks are gone, revealing beautiful wood underneath!
I ended up staining the top with a gel stain. This was my first time using this brand and it wasn't as thick of gel as Minwax is, as a matter of fact, I wouldn't call it a gel at all. It did come out gorgeous though!
Getting ready to paint the bottom...
I save the top coat until very last because I put on about 5 coats of polyurethane. I used a UV resistant glossy finish.
Before painting the drawers, I removed all the hardware and put wood filler in the holes. I painted 2 coats of Annie Sloan Chalk Paint on the bottom. I ended up mixing 2 colors which were called Graphite and Napoleonic Blue (Ratio: 4:1). I ordered online from The Purple Painted Lady, who had cute packaging details!
I've used clear wax for chalk paint previously, and I really like the look of it. This time, however, I just went with 2 coats of a satin polycrylic top coat from Minwax. I also ordered these drawer pulls from Amazon, I used the 12 4/5" and the 6 1/4" and spray painted them gold. I found some other gold pulls online but they were far more expensive. I got the little knob at Hobby Lobby.
Again, about 5 coats of polyurethane on top. Do a light sand in between coats so you don't get bumps in the finish. It turns out shiny and gorgeous.
I would recommend not setting anything on top of your project for a few days to allow the polyurethane to completely dry.
Here are a ton of pictures on the finished product.
Finally able to set some of his belongings on top.


No comments:
Post a Comment