
DAY 1
Well, I got all the supplies except the stuff to go in the bags for this game set. I did find some yellow and red canvas at JoAnn's for the bags and I'm even going to make this nifty little cinch sack to store them all in. More updates to come soon...

DAY 2
Well, Cand and I got a good jump on the cornhole set for Jared. If you would like to make your own we used directions from www.cornholehowto.com there you will find a set of supplies you will need as well as how to put it together. I cut the 2 of the 2x4x8 boards in half to start making the frame. Then used another 2x4 to cut 4 pieces 21" long to make the frame.

I also cut my sheet of plywood in half so that it's 2'x4' (this will go on top of the frame that we made).

The trickiest part was the legs. You use another 2x4 and cut 4 pieces down to 16" long. You have to kind of guess-timate where the bolt will go so that you can either fold the legs in or bring them out so that the board can stand up...or "pitch" as Jared calls it. Anyway, you have have to round the tops (that you don't see that are under the board) so that they rotate. Then after that, you have to cut the 16" long 2x4's down so that the board is 12" off of the ground and use a 45˚ angle so the board won't wiggle around.

We still have to cut out the holes for the bags to go in but couldn't find the thing that cuts them. But overall got a good jump on it today. We made two of these.

Things left to do:
- Cut out the hole
- Go back around some areas with wood filler/Sand
- Paint entire piece red then go back for the Chiefs logo
- Put on the clasps and handle (yes I'm that neat that I make it easy to carry)
- Make the bags
- Make a carrying cinch sack to keep the bags in
I guess I was feeling like a go-getter today. I also got the cinch sack done. I first made the sack out of extra canvas I had from the corn-filled bags (which I still actually have to make).
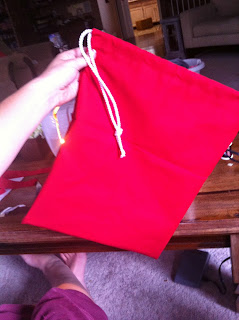
Then I drew the arrowhead and KC design on.

And used white acrylic paint

And then outlined everything in black. Not perfect but at least you can tell what it's supposed to be.

DAY 3
The holes have been cut, I went back over with woodfiller to make the board more smooth and easier for the bags to slide. So just have to wait while that dries before I can sand.
.JPG)
And I got the templates all cut out.
.JPG)
I'm trying to decide if I should add stripes on it somewhere...the white/yellow/white stripes that they have on the arms of their jerseys. Not sure what to do there....CHIEFS will be in yellow and the arrowhead is black/white/red of course. The circle at the top is going to be yellow also and the main part of the board will be red. They play a little differently than standard cornhole where if you get a bag in the yellow circle it's 2 points instead of 1.
DAY 4
Didn't get super far on it. I used a stencil and transferred it to the boards after painting them red. But I'm painting the stencils by hand which is taking a lot longer than I thought because each piece is probably going to need 3 coats. But hey, it's a start.

Taping things off. I wanted to make the stripes that are on the jerseys on the board so here's what I came up with.

Still need to go back over it with red in some spots and black on the arrowhead. And finish it off with a coat of polyurethane (finish the painting part anyway). I also got these locks and a handle so it's easier to transport and the sack with the bags of corn can go in the middle of the two boards to keep everything together.


Still need to go back over it with red in some spots and black on the arrowhead. And finish it off with a coat of polyurethane (finish the painting part anyway). I also got these locks and a handle so it's easier to transport and the sack with the bags of corn can go in the middle of the two boards to keep everything together.

DAY 5
I had to go back over with red and black a few times to get the look I was wanting.
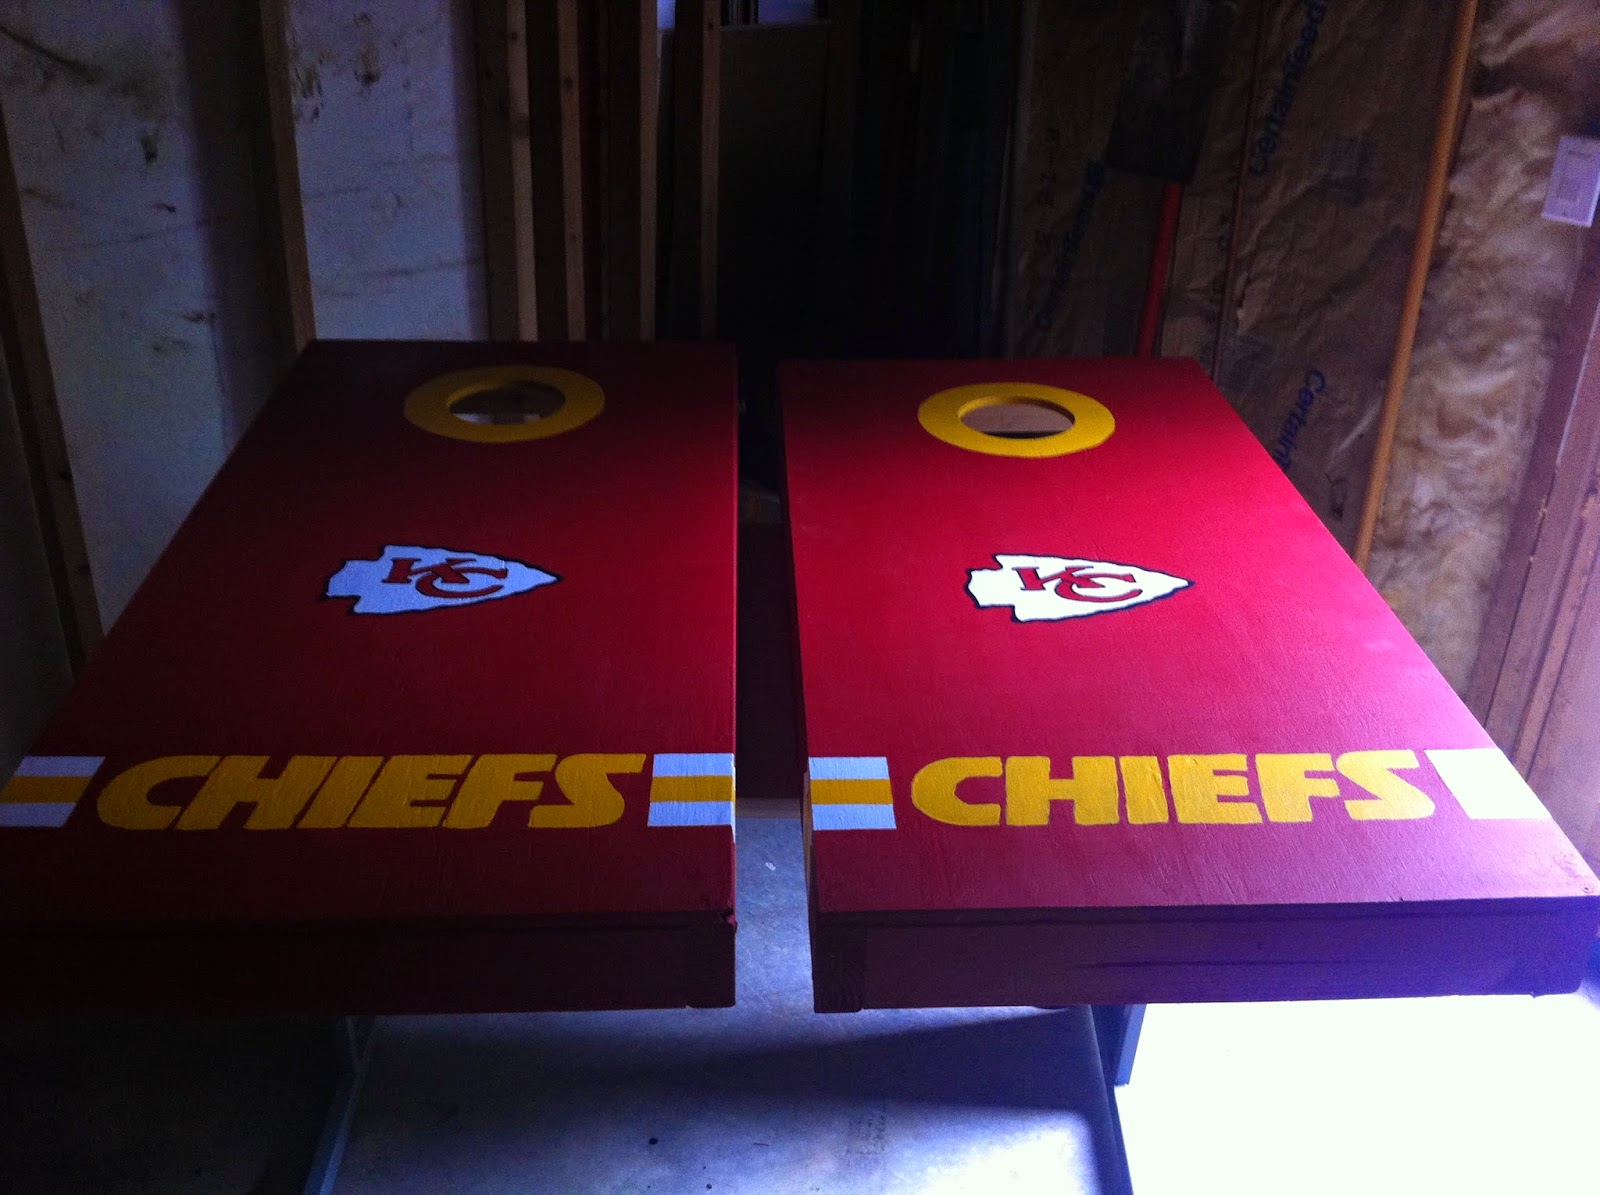
And then 1 coat of polyurethane and they are finally good to go.
Cornhole bags: after getting two different colors of canvas (I choose red and yellow), I cut them to 7" x 7" squares and sewed a 1/2" seem on all sides. On the fourth side I only sewed halfway so I could fill it with corn. I used 1 3/4 cups of corn. Then used the sewing machine to close up the last half. I went over the stitches 2-3 times to make sure the seams don't break since they get thrown over and over.
Special thanks to Cand for all of your help! They already got some use and work great!

No comments:
Post a Comment