

I've done research all day today on tufting and since we all know I'm not a sewer I'll be using washers and screws to tuft the fabric and foam. So here's my supply/to do list this weekend:
- Measure the coffee table
- Pick out gray fabric
- Foam that's at least 3" thick
- Batting
- 3/4" wood screws
- #10 washers
- 1/4" washers
- Cover buttons/half ball cover buttons 7/8"
- Petroleum jelly
CAN'T EVEN WAIT TO GET STARTED!
DAY 1
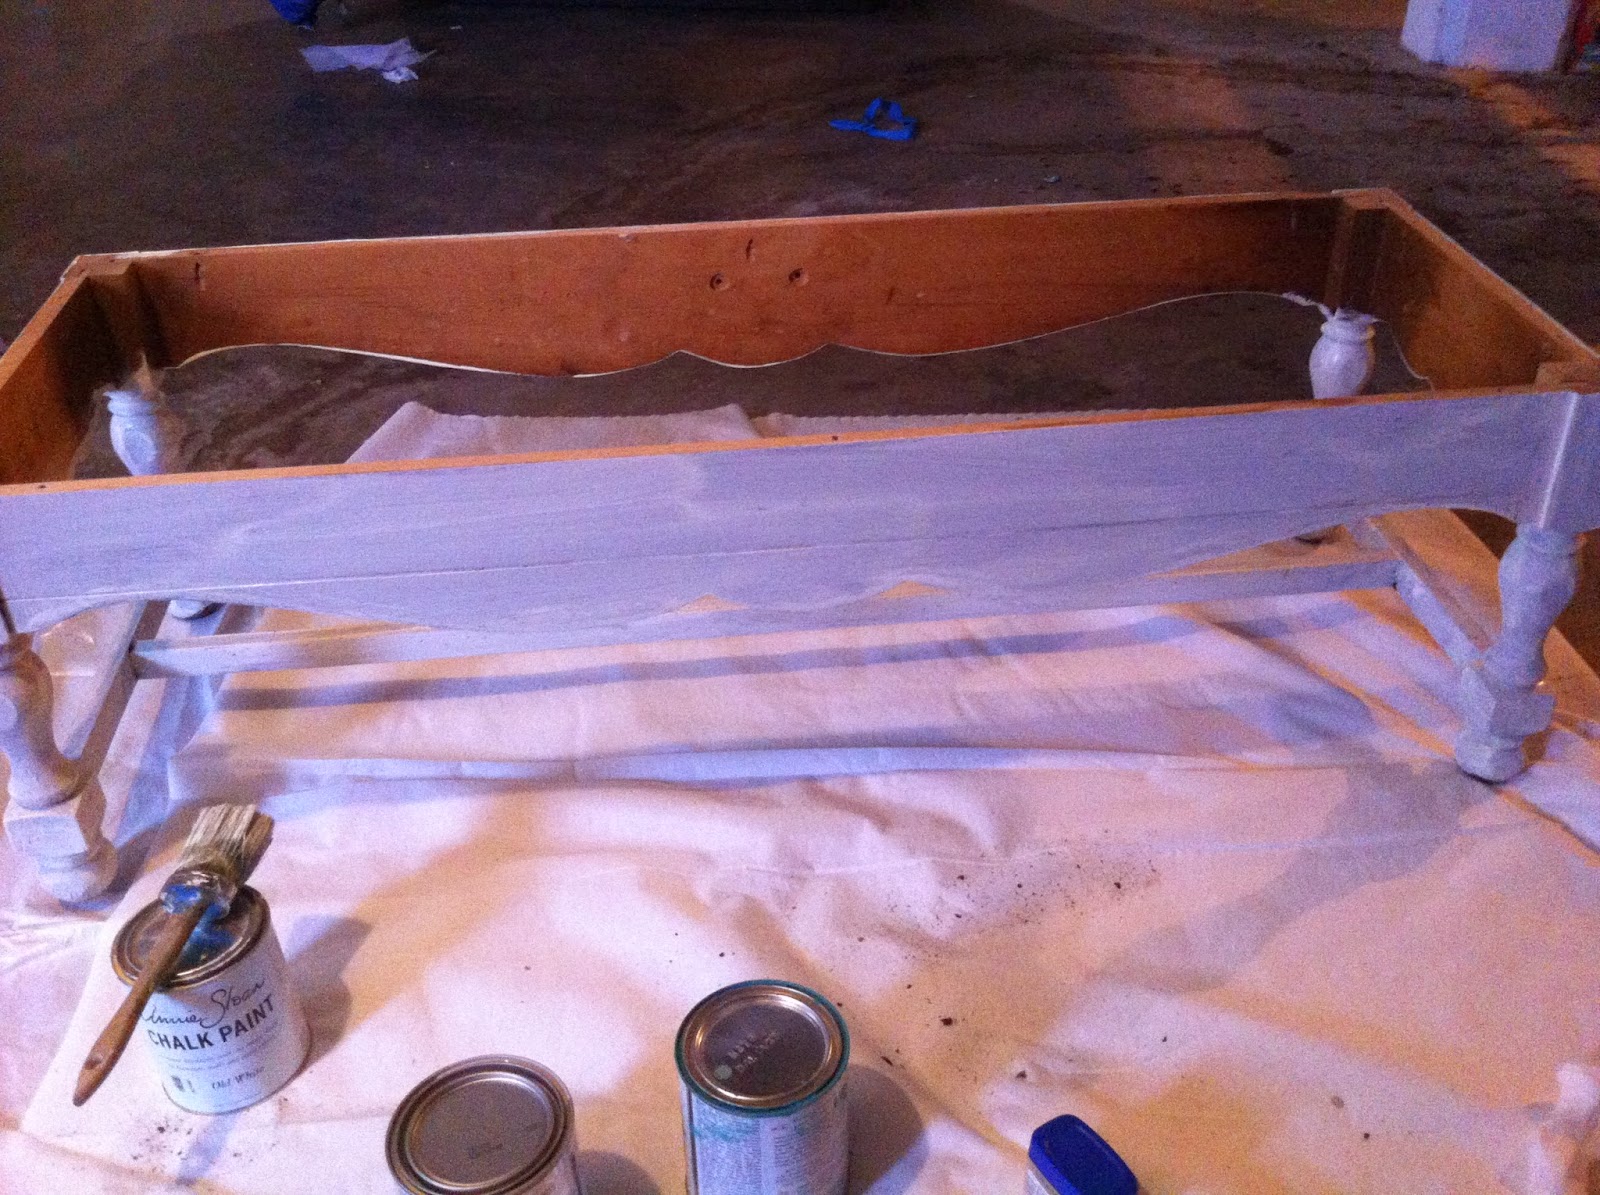
So I meant to get all of this shopping done on Friday, but that didn't happen so I spent 3/5 hours running around yesterday. I went to Lowe's to get some more paint...I tried making my first chalk paint, which I don't think I added enough of the chalky stuff to the paint. I also went to JoAnn's fabric to get some upholstered fabric (which I didn't get quite enough of so lets hope I can skid by with what I got). I didn't do any sanding to the coffee table I started with 2 coats of Old White chalk paint from Annie Sloan.

After 2 hours I was surprised to find out that it wasn't dry. Little did I know the area I checked was the area that I put the jelly on....so FYI if you try this out you can just use a damp paper towel to wipe the 2nd color of paint off those spots. You can still sand over top of that too after wiping but no need to ruin your sand paper on paint that isn't dry.
So here's what that looked like after wiping it down.

So not even going to lie about it, the jelly freaked me out a little bit so for the last layer of paint I didn't use it...since this was my "home made" chalk paint I decided not to test the waters too much. And here's the last layer with gray chalk paint.

.JPG)
.JPG)
.JPG)
.JPG)
.JPG)
See fits nice and pretty
.JPG) Then came the tough part about where the buttons should be placed...again a 4-5-4 pattern
Then came the tough part about where the buttons should be placed...again a 4-5-4 pattern
.JPG) Then covered the foam with batting
Then covered the foam with batting
.JPG) And stapled the batting to the back of the table top
And stapled the batting to the back of the table top
.JPG) Now the foam is held securely into place. I made a huge mistake yesterday about how much upholstery fabric I thought I needed to have, so I have to go get more at JoAnn's today. I'm thinking about using the fabric I got yesterday for accent pillows so it doesn't go to waste. Luckily this fabric is reversible so if I do decide on making pillows or maybe a lamp shade out of them I can flip it over for the same design but the colors would be in reverse.
Now the foam is held securely into place. I made a huge mistake yesterday about how much upholstery fabric I thought I needed to have, so I have to go get more at JoAnn's today. I'm thinking about using the fabric I got yesterday for accent pillows so it doesn't go to waste. Luckily this fabric is reversible so if I do decide on making pillows or maybe a lamp shade out of them I can flip it over for the same design but the colors would be in reverse.
.JPG)
And for people like me, who have no sewing capabilities what-so-ever, tufting with washers and screws was an EASY alternative. I took one side of scissors and poked a hole through the batting and foam where my marks were at. Also, be sure to begin drilling really, REALLY slowly to push through the fabric and then pushing down pretty hard on the drill to get through all of that foam to the board.

And here is the full view...

 And next step would be to attach the buttons, since I'm not doing regular tufting I had to use fabric glue to attach them.


.JPG)

So here's what that looked like after wiping it down.
So not even going to lie about it, the jelly freaked me out a little bit so for the last layer of paint I didn't use it...since this was my "home made" chalk paint I decided not to test the waters too much. And here's the last layer with gray chalk paint.
DAY 2
When I woke up this morning I did a little bit of sanding on one side just to give you an idea of what it would look like
Here's a little bit closer of a view
You can see the 3 different paint layers and some of the original wood.
I still have to finish sanding then wax it. So that part of the project is to be continued. I also started my fabric covered buttons. I got a kit from Joann's yesterday and let me tell you, the thicker the fabric the harder this whole process was.
I ended up making 13 of these fabric covered buttons and the bench is going to have a 4-5-4 pattern leaving 5" open on all sides of the bench.
I also purchased some 3" thick foam and batting from JoAnn's yesterday so I had to cut the foam down to the dimensions of the table (FOAM IS NOT CHEAP!). I just used an electric bread knife to cut the foam down to size.
See fits nice and pretty
And for people like me, who have no sewing capabilities what-so-ever, tufting with washers and screws was an EASY alternative. I took one side of scissors and poked a hole through the batting and foam where my marks were at. Also, be sure to begin drilling really, REALLY slowly to push through the fabric and then pushing down pretty hard on the drill to get through all of that foam to the board.
And here is the full view...
DAY 3
Next, I went on to stapling the fabric to the back of the table top. Definitely helps to have two people when doing these last few parts. Here's the back and front view after stapling the fabric to the back.
Gluing the buttons has been an interesting experience...
This is the fabric glue I decided to try and the buttons aren't wanting to stay in place so I found random house hold objects to keep them down in there. I will probably let this dry for a good 5 hours or so before attempting to take any of them off.
Happy to report that the fabric glue did the trick on the buttons. I finished the base of the bench (sanding) and put a coat of wax on it. I let it dry for an hour before attaching the top seat.
Here's the view from the top....
And there you have it, the long awaited before and after photo.
No comments:
Post a Comment