Friday, August 7, 2015

Living Room - Refinishing hardwood floors

The living area was probably one of the most time consuming projects.  I'm not sure what kind of paint they used but it was thick and very shiny!  As a matter of fact in the beginning, it was peeling off in sheets.  I assumed this was going to be a quick easy fix of tearing off the old paint and just repainting it.  Little did I know the closer you got the the ceiling, wall, window, or outlet that it began getting extremely hard to get all the paint off.  There was also a hole in the wall, and a part to the ceiling that needed to be replaced because the roof was leaking.

Roof leak was fixed, and I did tear out the ceiling that was damaged and replaced it.

Here are some before pictures.


And some pictures during this whole transformation process.


That's right, I learned how to patch a hole!


See?!?  The hole is gone!


I went with a cream color for the walls from Valspar called Snowy Dusk, and I painted the trim a color called Bistro White that's also from Valspar.


Looks a lot better!  Cleaner and newer looking already!  You can see up the staircase what the old color was for the walls.


Well, refinishing the hardwood floor project is officially underway. Slowly but surely making progress. I rented a drum sander and edger from Home Depot. Had very little success with the edger on day 1 due to faulty equipment but after exchanging and getting a new one...we are making progress.


After 1 coat of stain (Early American from Minwax) and 3 coats of semi-gloss polyurethane


Life outdoors

Subtle differences, make a difference.  A little hard to see but the light pole in the before picture used to be on top of this wooden platform which sides were constructed of lattice...not very eye pleasing if you ask me.  That was all ripped out and the light pole was moved.  The garage doors have also been painted.  The front door was replaced (there will be a separate post about that).  The back yard has this new drainage system because the basement used to flood, and now that problem has been resolved.  So here are some before pictures to give you an idea.

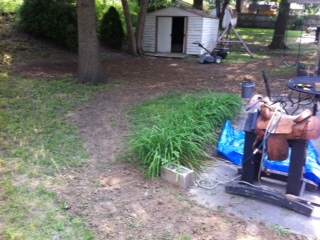
These are of the back yard and you can see that it was left in bad shape.


And the view from the front


After doing the trenching project in the backyard it left mounds of clay/dirt everywhere.  This weekend I borrowed a roto-tiller and spent all day outside with that thing and a hoe to spread it around in an attempt to make the ground a bit more level.  Next step, planting grass (all I have currently is dirt and weeds).


So thankful for neighbors! We got the play set all moved, more of the yard tilled, grass seed is down and now it's raining. Yeehaw, a yard full of grass....hopefully soon. 


Well I have been watering daily and I do believe I see a little something coming up out of the ground. 


Waiting 3-4 weeks to mow is going to be tough...

Still no mowing yet but it's looking better, couple more weeks and I can mow!


Welcome Home

Welcome to my new home!  I have been dying to share this with you but wanted to wait until everything officially went through.  I know this blog has ultimately revolved around restoring furniture and things but now in addition to that, you will get to see this once run down house transform into a home.  I've had a lot of help and support so far and I can't wait to continue on this adventure.  Here's to new beginnings!


Sunday, August 2, 2015

IKEA couch hack

My sister has been talking about putting different legs on this couch for a while.  She was so kind to let me share her experience.  These are the steps she took to update her couches she got from IKEA.


We went to Lowe's together while I was working on the dresser that's going to be my tv stand.  I think seeing the legs I bought for the dresser got her motivated to change hers.  So here's what she picked out.


This is after she had already stained them, here's the stain that she used.


Her project had a delay too, come to find out she needed the adapter piece because the original ones didn't fit the screws on the new legs (delays in projects runs in the family I guess).


So she popped the old ones off, and put the new ones on.  She got the same kind that I did for the dresser.  We both got these at Lowe's.


And once she attached those she put the new legs on.


And there you have it.  Didn't they turn out great?


Quilt

I know I posted before about the beautiful quilt my amazing sister is making for me.  I wanted to share some updates and will of course post a final picture once it's on my bed!

This is the picture you will recognize from a previous post (I think it's stuck in there when I refinished my dresser for my bedroom).


So after we cut out all those squares look how she did, amazing right?


The other night I got to be her assistant...just holding the quilt is crazy!  It's so big and I think really has to be a two person job.


And I had to test it out a little ;)


Making some progress on the quilt! Hopefully will be done before I move. I just need to put on the binding now, oh how I wish my sister were here.


And the back


Can't wait to get it finished and see it in it's new home!


Working on the binding, so close to getting this finished!


Yay! The quilt is all done!!


Friday, June 26, 2015

Cedar Collage Picture Frame (Father's Day)

Finally I get to share this!  A little belated due to traveling but finally got to give dad his Father's Day gift to be hung in the workshop.  Candi and I worked for hours on this thing (not even kidding).

We bought 1x4x8 cedar boards from Home Depot and cut them in half.


Give her a break ^  It was roasting outside!


Then we used the miter saw at what we thought was a 45 degree angle.  This is proof that there were these little red clamps on the work bench that didn't allow us to put the angle at 45 degrees.  So we accidentally wasted our first board with a bunch of sides for the frames cut to a 30 degree angle...I guess if we ever make a pentagon frame, we'll be all set.


As my dad always says, "it's easier to laugh at your mistakes".  This is a classic move that happens to me each project...I'm sure you've noticed by now.

So on to the next day, after purchasing another board.  We finally got down to business.  After cutting the board in half again, Candi used the table saw to cut out this little groove down the sides of the two boards where the glass and backing will set in.  I used the miter saw to successfully, this time, cut the boards at a 45 degree angle.  We measured from the back of the frame where the inset groove was (for the glass) and measured out the board to be cut at 6" (we needed 18 of these pieces to make our 9 planned picture frames) and 4" (needed another 18 pieces of these....which required Candi to make another trip to Home Depot for another board...I guess I didn't calculate right).


We put the frames together with wood glue and a nail gun, then connected our 9 frames using the same technique.  And came out with this.


Now the next part, I have to give full credit to Candi because I had absolutely no clue how we were going to keep the glass/picture/backing from falling out of the frame.  She suggested we put 3 screws on each frame, 2 up top and 1 on bottom and place a rubber band around them.  Quick fix, genius.


I did it vertically and horizontally on each frame just if incase....don't need anything falling out you know.


And then put all the workshop pictures in to get him started.  He can always change them out but I put a few of my favorites in there.

After that we wanted to make it a little more personalized so we did some wood burning.


And it's all complete!


Happy Father's Day Dad!