My sliding glass door to the backyard is in need of some attention. #1 it's brown...not my color, everything in this house seemed so dark when I bought it. I want to lighten and brighten this place up! I've read a few articles on people who have painted their sliding glass door frame and it doesn't seem too terrible, for certain it's better than purchasing a new door and installing it so.....let's give it a try.
Here's what it looks like currently. View from the inside and the outside.
It also has this lock on it, that's currently being held together by duck tape...yuck.
And of course the handle that doesn't lock at all.
And some more broken pieces....
I kept searching the internet trying to figure out what this piece is called...well, I came up short. So I'm going to try to use white weather stripping in there and see what happens.
First order of business is getting rid of the duck tape. Spent an hour fiddling with this lock, and what do you know...it can be fixed. Saves me money no longer needing to order a new one. Bye bye duck tape!
Next, I need to cover the window panes with newspaper and painters tape and do the same for my trim. I'll be painting both the inside as well as the outside of the door frame. Also, I think the frame could use a good scrubbing, I read that it's best to use TSP so I'll give that a try.
1st coat of paint on. I used this enamel spray paint from Rust-Oleum, it's a white semi-gloss. I read some reviews that it sticks well and dries fast.
Here's the new handle I got. I ordered it off Amazon.
So I ran in to a bit of a snag. My already drilled holes in the door don't quite match up with the handle. So I'll need to fiddle with that for a little bit before I can put the handle on. Not to bad for a couple coats of paint, eh?
Here's a comparison picture so far...
So the handle I order was quite the ordeal. I read the reviews before I ordered it and seemed like everyone had the same complaint, that the screws it came with were too short. Well, it was one of the cheaper one's out there and I, like everyone else, also found that the screws provided weren't long enough. A trip to Lowe's and a coat of spray paint solved that dilemma...but I was without a door handle for about 3 days.
I also, after the same 3 days, got to take the newspaper off outside! Finally! I'm sure my neighbors were just about as sick looking at it as I was.
I'm still fiddling with the side of the door. I never did find the right piece of trim to go in there, but I did find some PVC trim that I think I can make work with some silicone. It's not perfect but it will do.
I ended up using about 3 cans of spray paint...so we'll say around $15 in paint and $28 for a new handle set....last thing I need to get is a screen door and I should be all set.
If you are in the market for Missouri real estate be sure to check out Harmon Homes
Wednesday, December 21, 2016
Tuesday, December 20, 2016
Lego table
I think I've had this idea saved on my Pinterest since the beginning of time. I've seen so many of these tables at thrift stores and right when I'm ready to tackle this project, I only ran across one. Lucky me.
So first thing is to cut a hole on the top big enough to fit a plastic bin. I traced the upper part of the bin onto the table with a permanent marker, Then, I made a smaller template by bringing it in about 1/4". The first few times the bin wouldn't go in right so I just kept trimming until it did. Snug as a bug.
I lightly sanded some of it, I wasn't being too particular about it just any rougher areas that I felt.
First coat of chalk paint is on, I used Relic from Americana Decor.
This paint covers pretty well, I think I'll only need 2 coats on it. After the 2nd coat dried I put a coat of clear wax on it.
I also ordered the lego plate from Amazon as well. Just some E6000 glue on the back to hold it down. I put a heavy object on top of the plate and let it dry over night.
Simple enough project, just in time for Christmas. Hope he loves it.
Before and after.
So first thing is to cut a hole on the top big enough to fit a plastic bin. I traced the upper part of the bin onto the table with a permanent marker, Then, I made a smaller template by bringing it in about 1/4". The first few times the bin wouldn't go in right so I just kept trimming until it did. Snug as a bug.
I lightly sanded some of it, I wasn't being too particular about it just any rougher areas that I felt.
First coat of chalk paint is on, I used Relic from Americana Decor.
This paint covers pretty well, I think I'll only need 2 coats on it. After the 2nd coat dried I put a coat of clear wax on it.
I also ordered the lego plate from Amazon as well. Just some E6000 glue on the back to hold it down. I put a heavy object on top of the plate and let it dry over night.
Simple enough project, just in time for Christmas. Hope he loves it.
Before and after.
Monday, December 19, 2016
Mermaid tail blankets
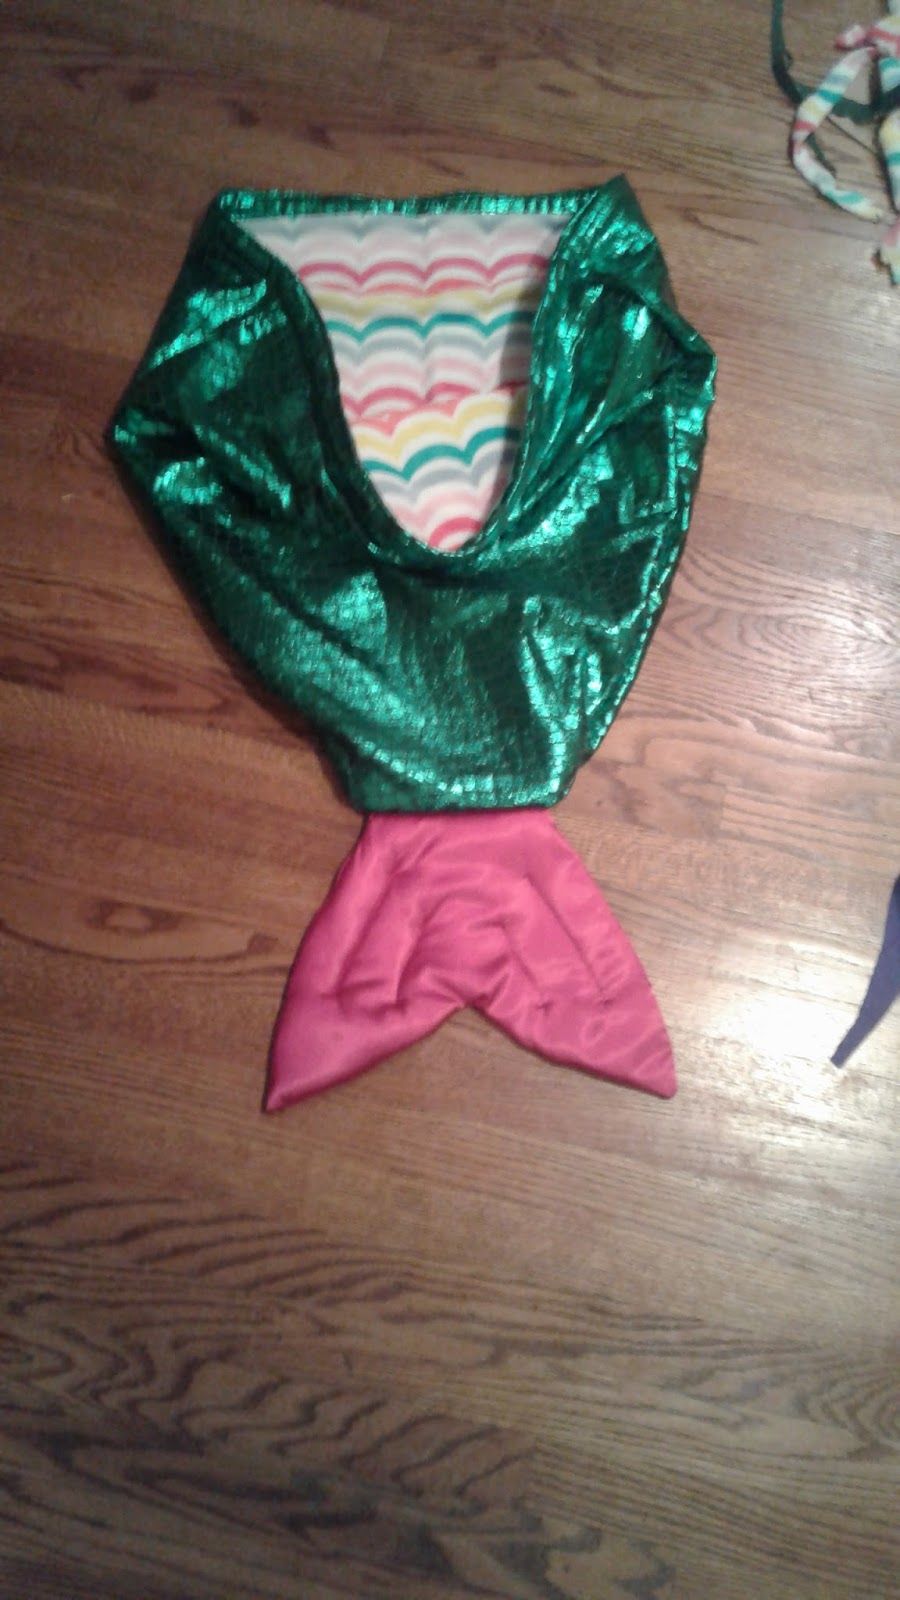
For Christmas I originally wanted to make my twin nieces crocheted mermaid tails. Well, the yarn situation didn't pan out so I decided to sew them instead. I've never really been that great at sewing...I went online to see if I could find a pattern, after about 15 minutes I gave up and decided to make my own.
I ended up purchasing the fabric at Walmart. My usual go to spots for fabric are Joann's or Hobby Lobby but we have had some pretty rough weather here lately so we decided not to go too far from home. B did a great job and helped me pick out the fabric.
The inside of the tails are lined with a super soft fleece fabric. The fins have batting inside them so they aren't as "floppy". I used freezer paper to create my own pattern...as you can probably tell, definitely not professional but made with a ton of love.
So I began by cutting out all the pieces...
You will need a front and a back, that's right 2 of everything (in my case 4 of everything since I'm making these for 2 very special girls).
The first thing I sewed on each of them was the fin. I turned the fabric so the wrong side of the fabric was facing the outside world. I sewed everything but the top of the fin. After, I turned it right side out and put in my batting (I cut it into the same shape as the fin with my handy dandy freezer paper pattern). Once I got the batting in, I sewed a couple lines on either side of the fin to make it look,,,,,cooler I suppose, it also doubled in keeping the batting from moving around.
I still left the fin top open. So next I sewed the sides of the blanket. Here's how I laid out my pieces. First, lay down the fleece lining to where the pretty side (right side of the fabric) will face the world (I use the term "world" because inside/outside seems repetitive). On top of that you will lay down your outer fabric (I chose a green scaly looking fabric) but you will lay this one down to where the wrong side is facing the world and you will be looking at the pretty side. 3rd layer, another outer fabric..only this time the pretty side of the fabric will be facing the other pretty fabric from layer 2. Finally the 4th layer will be the fleece lining with the pretty side again facing you. I'm sure you were clever enough to come up with all that on your own but it took me a good minute to make sure everything was laid out properly, again sewing isn't my strong suit.
Alright, so as I said I sewed up each side of the tail.
Once that was done, while the blanket is still inside out I thought it was a good time to attach the fin. So I took the fin and slide it inside the blanket (the blanket bottom end was facing up and the fin end with the batting showing was also facing up) and ran a couple zig zag stiches across it to make sure it didn't fall off. Then I turned the blanket right side out and what do you know....my fin is attached. The last thing I did was hem the actual top part of the blanket. Here's some pictures of how they turned out.
Nice and soft inside...
They may look a little funny all spread out, my son commented on how "huge" they were...but really it's supposed to be a blanket with room to spare....not stuck to you closely (I'm a bit claustrophobic so up close and personal is not my thing)
I've always loved mermaids, and now I hope that my nieces will too.
I ended up purchasing the fabric at Walmart. My usual go to spots for fabric are Joann's or Hobby Lobby but we have had some pretty rough weather here lately so we decided not to go too far from home. B did a great job and helped me pick out the fabric.
The inside of the tails are lined with a super soft fleece fabric. The fins have batting inside them so they aren't as "floppy". I used freezer paper to create my own pattern...as you can probably tell, definitely not professional but made with a ton of love.
So I began by cutting out all the pieces...
You will need a front and a back, that's right 2 of everything (in my case 4 of everything since I'm making these for 2 very special girls).
The first thing I sewed on each of them was the fin. I turned the fabric so the wrong side of the fabric was facing the outside world. I sewed everything but the top of the fin. After, I turned it right side out and put in my batting (I cut it into the same shape as the fin with my handy dandy freezer paper pattern). Once I got the batting in, I sewed a couple lines on either side of the fin to make it look,,,,,cooler I suppose, it also doubled in keeping the batting from moving around.
I still left the fin top open. So next I sewed the sides of the blanket. Here's how I laid out my pieces. First, lay down the fleece lining to where the pretty side (right side of the fabric) will face the world (I use the term "world" because inside/outside seems repetitive). On top of that you will lay down your outer fabric (I chose a green scaly looking fabric) but you will lay this one down to where the wrong side is facing the world and you will be looking at the pretty side. 3rd layer, another outer fabric..only this time the pretty side of the fabric will be facing the other pretty fabric from layer 2. Finally the 4th layer will be the fleece lining with the pretty side again facing you. I'm sure you were clever enough to come up with all that on your own but it took me a good minute to make sure everything was laid out properly, again sewing isn't my strong suit.
Alright, so as I said I sewed up each side of the tail.
Once that was done, while the blanket is still inside out I thought it was a good time to attach the fin. So I took the fin and slide it inside the blanket (the blanket bottom end was facing up and the fin end with the batting showing was also facing up) and ran a couple zig zag stiches across it to make sure it didn't fall off. Then I turned the blanket right side out and what do you know....my fin is attached. The last thing I did was hem the actual top part of the blanket. Here's some pictures of how they turned out.
They may look a little funny all spread out, my son commented on how "huge" they were...but really it's supposed to be a blanket with room to spare....not stuck to you closely (I'm a bit claustrophobic so up close and personal is not my thing)
Sunday, December 18, 2016
Crocheted pouf
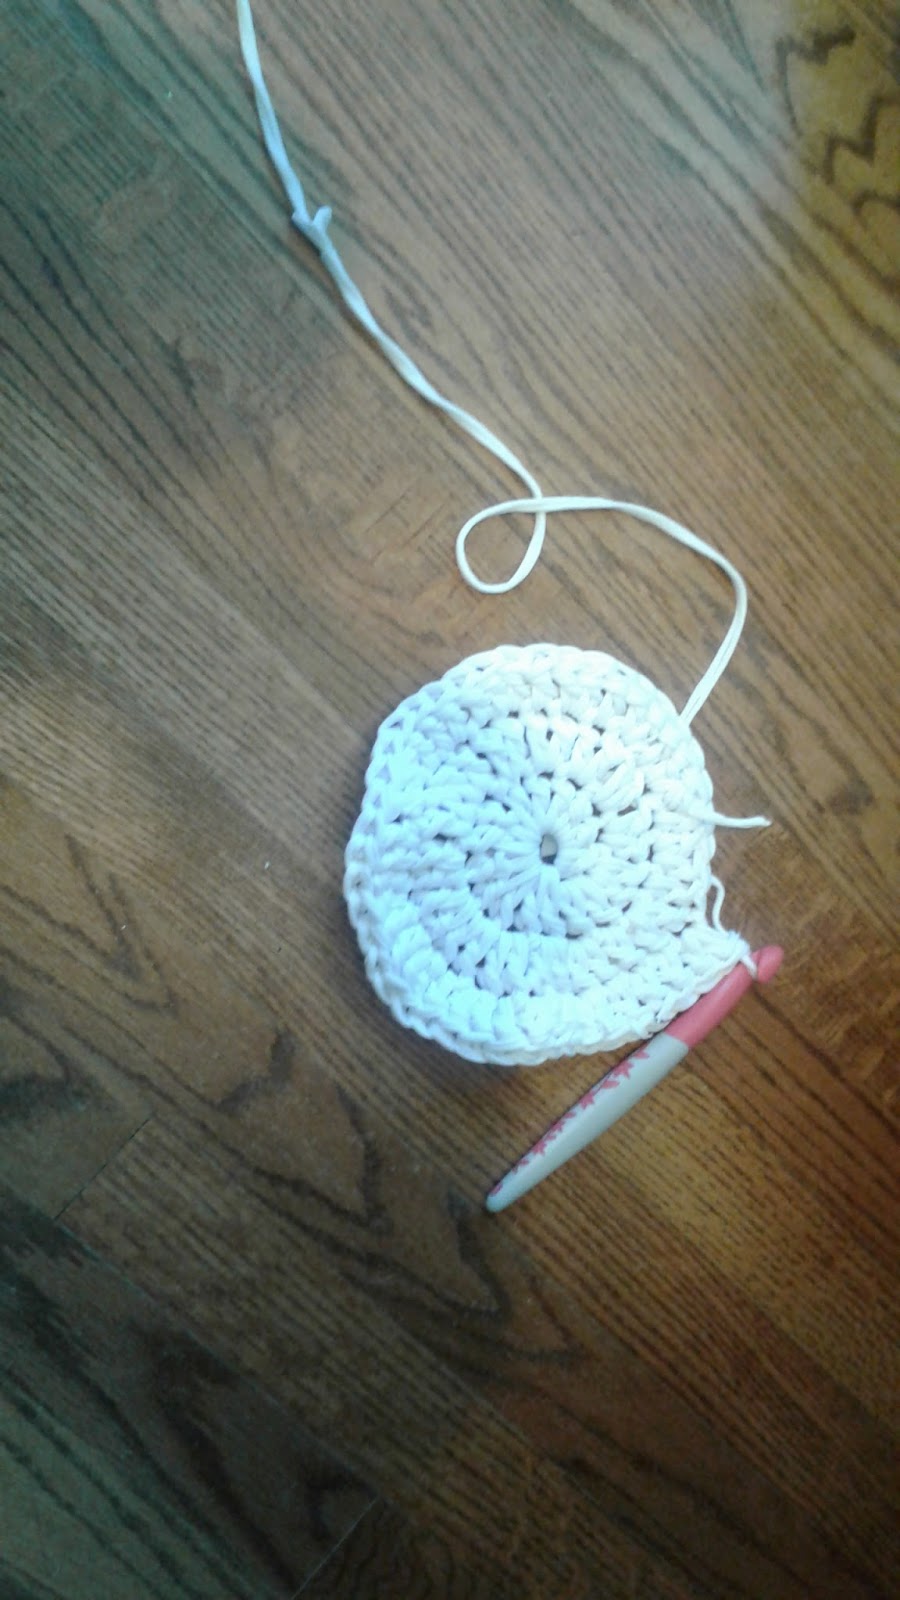
I wanted to make t-shirt yarn and instead of buying a ton of white t-shirts I found some jersey knit fabric at Joann's and bought them out...it was just shy of 10 yds. I found a great reference for cutting a continuous strip of fabric at Micah Makes. Once I cut the strips (I made mine 1" wide) you simply stretch it out. I continued to cut as much as I could with the cutting mat, then would switch to stretch the fabric and winding it up into a ball.
For the pouf itself, I went off a pattern from Gleeful Things. The one she made measured about 10" high...I wanted mine to be double that so I added some more rows based off her instructions. I went up to 10 SC to 1 DC.
This is taking FOREVER
Want to hear something crazy? I almost used all of the fabric. I had planned to use some of it to make a bag to hold the stuffing....didn't even have enough for that. So I used an extra twin fitted sheet instead.
So, I used a bunch of wadded up newspaper and 5 lbs of stuffing and came out with this.
I don't like it one bit. I keep calling it frumpy.....
I guarantee you before the night is over, this is all going to be unraveled and I will redo it sticking with the original plans.
So I had plenty of t-shirt yarn to spare so I made her a couple of the smaller poufs.
For the pouf itself, I went off a pattern from Gleeful Things. The one she made measured about 10" high...I wanted mine to be double that so I added some more rows based off her instructions. I went up to 10 SC to 1 DC.
Making some progress
This is taking FOREVER
Want to hear something crazy? I almost used all of the fabric. I had planned to use some of it to make a bag to hold the stuffing....didn't even have enough for that. So I used an extra twin fitted sheet instead.
So, I used a bunch of wadded up newspaper and 5 lbs of stuffing and came out with this.
I don't like it one bit. I keep calling it frumpy.....
I guarantee you before the night is over, this is all going to be unraveled and I will redo it sticking with the original plans.
So I had plenty of t-shirt yarn to spare so I made her a couple of the smaller poufs.
Saturday, December 17, 2016
Workshop Clock
My dad has been asking for something like this forever, I think he first mentioned it about 3 years ago. His request was to have a clock made from a saw blade with a picture painted on it (my sister is really artistic and does an amazing job) to hang in his shop. So from that I decided that I wanted to find a photo of the house he grew up in (you should hear some of the stories about him and his brother). Turns out, finding that photo was harder than I ever expected.
I called my grandma to see if I could get some more information. Surely with all the updated technology I could save myself from a 2 1/2 hour drive and google map it or something. I asked my grandma if she recalled the address, she said it was on Route 2. Trying to get down to the bottom of it I asked for the house #, she said, "oh they didn't have house numbers back then". WHAT?!?! I called my dad to see if he could remember where this house was at and he said that it was on a road known as "Old Antelope Road"....okay so now that I feel like I traveled down a rabbit hole....
I then talked to my aunt and uncle who live in the same town as the house and asked them about it. Although they also didn't have any pictures of the house back when my grandparents lived there. My aunt did some searching for me and another family that lived there some time back had a photo of the house.
My aunt told me it was still there but it was falling down. She said she could run by it and get a picture for me if I thought it would help. It sure did, so that was puzzle piece #2
So we are going off these 2 pictures and personal recollection from my grandma for the rest of the details.
I had an old saw blade donated to me by a family member.
I gave it to my sister and received this back. Didn't she do a fantastic job?
Now for the easy part, making it into a clock. I picked up some clock parts at Hobby Lobby. I spray painted the hands black. The only thing I had to add that didn't already come with the clock parts was a fender washer because the saw hole was too big.
And that's all there was to it!
I called my grandma to see if I could get some more information. Surely with all the updated technology I could save myself from a 2 1/2 hour drive and google map it or something. I asked my grandma if she recalled the address, she said it was on Route 2. Trying to get down to the bottom of it I asked for the house #, she said, "oh they didn't have house numbers back then". WHAT?!?! I called my dad to see if he could remember where this house was at and he said that it was on a road known as "Old Antelope Road"....okay so now that I feel like I traveled down a rabbit hole....
I then talked to my aunt and uncle who live in the same town as the house and asked them about it. Although they also didn't have any pictures of the house back when my grandparents lived there. My aunt did some searching for me and another family that lived there some time back had a photo of the house.
My aunt told me it was still there but it was falling down. She said she could run by it and get a picture for me if I thought it would help. It sure did, so that was puzzle piece #2
So we are going off these 2 pictures and personal recollection from my grandma for the rest of the details.
I had an old saw blade donated to me by a family member.
I gave it to my sister and received this back. Didn't she do a fantastic job?
Now for the easy part, making it into a clock. I picked up some clock parts at Hobby Lobby. I spray painted the hands black. The only thing I had to add that didn't already come with the clock parts was a fender washer because the saw hole was too big.
And that's all there was to it!
Subscribe to:
Posts (Atom)